Railway Station Part One
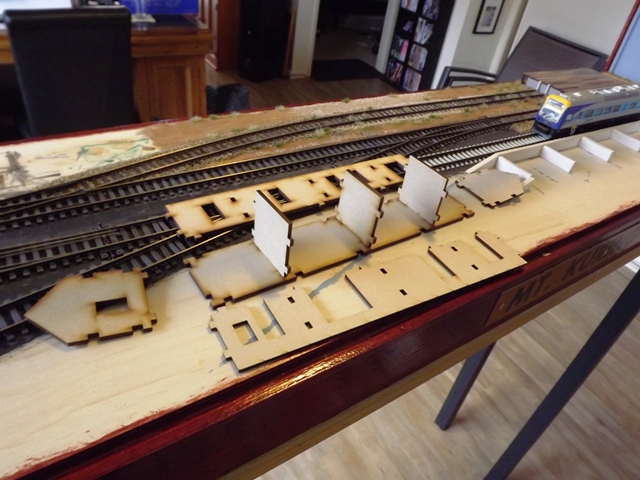
On most model railways, the centrepiece of the layout is more often than not the railway station. My layout is no exception. In fact, the track plan for Philden was designed around having a 2 car Xplorer passenger train pulling up alongside a typical country railway station somewhere in New South Wales. So for that I chose a Model Train Building's laser cut timber kit of an A-4 design NSW station building.
 |
| Assembling the body of the station building gave me the dimensions to begin working on the platform. |
While starting work on the railway station building was not the next priority on my list, I did need to get the dimensions for the model to build the foundations for my platform before I could finish ballasting the track at the book end of my layout. Straight out of the packet the kit looked a little overwhelming, until I realised that the body of the building and the outside 'skin' of the laser cut model are two separate things. That made assembling the body of the model to get the dimensions a breeze. Basically, its a floor with outside and interior dividing walls that give the building a 235 mm x 45 mm dimension.
 |
| 5 mm balsa wood gave me a strong enough frame to build the platform on top. |
With the box frame of the model glued into place, I next turned my attention to building the footprint of the station platform. A 2 car Countrylink Xplorer was all that I had room for on my layout, and as the real-life counterpart had a length of 50.5 metres, I needed to allow 600 mm to accommodate a HO scale version of the train sitting at my platform. So, I built a box frame for the platform using 5 mm balsa wood that measured 650 mm long (including the end ramp section) x 55 mm wide, and built another box section behind it for the station building to sit upon. The platform surface will be made from 3 mm balsa wood, so I used the Xplorer lead car as a guide for measuring the platform height and cut the platform sides to a height of 13 mm.
 |
| Test fitting the station building kit to make sure everything is square before getting to work on detailing the platform. |
Once the platform surface is glued into place on top of the box frame as shown above, the platform will sit a total of 16.5 mm above the layout surface. But before I continue working on the station building or glue the platform into place, I am going to hand carve some detail into the platform sides. That however, is going to be a project for another day.
See also; Railway Station Part Two and Building a Station Platform


Comments
Post a Comment
Thanks for taking the time to visit Philden. I hope you'll book a return ticket soon. Cheers, Phil