Showing posts with label Philden. Show all posts

Monday 3 January 2022

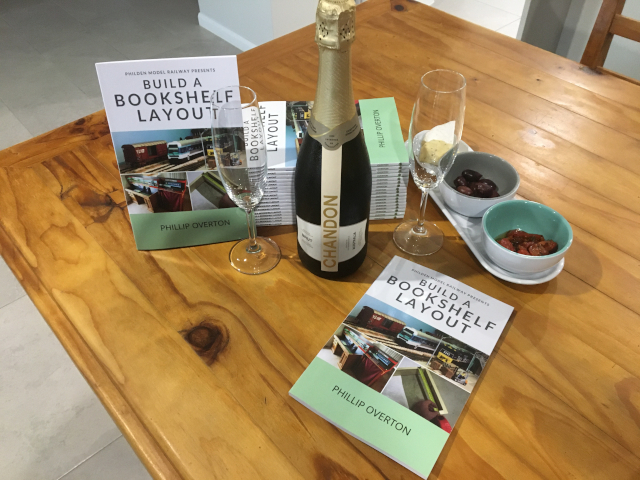
Bookshelf Layout Book Launch!

Another year... and another new book!


After a busy Christmas and New Year's break, I can finally announce the release of my first All-Australian model railway book! Build a Bookshelf Layout is available now to kick-off what I hope will be a fantastic 2022.


Five years in the making, this 72 page colour instructional book is a great starting place for newcomers and old-heads alike to read before constructing their next model railway project. A good finish begins at the start, and I've often found that overseas books offer little beyond a trackplan and some diagrams that leave you floundering to work out why your finished layout doesn't resemble the masterpiece shown on the cover. This book is the opposite! Its' hands-on, step-by-step approach is designed to fast-track your skills and enjoyment, without learning what works, and what doesn't, the hard way!


There's over 40 years experience laid-out inside, more than 70 photos and enough informative text that will talk you through what you need to consider on the way to constructing an enjoyable small model railway layout. The book covers the planning process, benchwork construction, painting and layout presentation, lighting and basic track laying skills that all result in a rewarding model railway experience.

Two more books covering scenery and trackside tips will also be available in 2022. Build a Bookshelf Layout is to the best of my knowledge, the first Australian model railway how-to book to hit the market.

The book will set you back $21.95 Australian + postage for the 6" x 9" printed version direct from the publisher Blurb, or you may pester your local hobby store and they may just stock it for you. All my books are also available to download as eBooks direct through Blurb or the Apple store, with prices starting from $5.99 AUD.


It was an idea that I first nutted-out while exhibiting my Australian HO layout Philden between 2017-2019. During the 8 exhibitions I took the layout to, I was inevitably asked time and time again, "how did you do this", as countless members of the public pointed to various items on the layout. While I answered as best I could given the limited time I had available between questions, I ended up printing business cards with the address of this blog to hand out. The writer in me however, was already pondering how I could layout a book that would serve as a guide to fast-track new modellers to build an exhibition quality layout of their own. And that is what this first book is all about, avoiding losing someone from the hobby because they can't seem to progress beyond the poke-your-train to get it to move Plywood Central, that does nothing for anyone's enjoyment.


So while I busy myself on working on the second book, I'm also working behind the scenes contacting various outlets and bookstores who may be interested in stocking the title. Time and work-wise, it has been a huge investment. More so on account of the work I've turned away from our small business to accommodate the time needed to write and produce this book myself. As most businessfolk will attest, I'm so heavily invested into making this next project successful, that it's become impossible to walk away from.


The best way I can ask for support, is to put out a call to share or like this post, follow me on Facebook and recommend the book to your friends, club and local hobby store. Purchasing direct online from Blurb offers bulk purchasing discounts from ordering as little as 10 copies, and if you're in one of the many Facebook model railway groups that I'm a member of, watch out today for a special advance copy offer.


Now... I must get back to working on my layout. I have a DCC system to wire up and track to lay for the staging yard!


Cheers,

Phill O

Tuesday 14 May 2019

End of the line...


What took the best part of two years to complete took less than a day to salvage, dismantle and ultimately reduce to the pile of scrap you see above. I suppose with it comes a sense of finality, that Philden has indeed reached the end of the line. Unable to sell the layout by the close of its final public showing at this year's Brisbane Model Train Show, and ahead of moving house, a week later I made the call to strip the layout of its usable parts and pack away the buildings into some small storage boxes in case called upon in years to come. Finally, I cut the timber-work into pieces small enough to shove into a wheelie bin.

I managed to save the timber decking in one piece to re-use on a later layout.

The goods shed and railway station building were made to be removable, as such never went back onto the layout following pack-up from the Brisbane Show. The scratch-built timber deck for the goods shed however needed to be cut away from its balsa wood foundations. I found a long-bladed hobby knife extended to full length was enough to gently slice back and forth until it came free without damage. I intend to re-use the goods shed and timber deck with some slight alterations on my next layout.

The exhibitor plaques and station memorabilia were all able to be removed from their adhesive tape backing.

Having kept the beach extension section of my layout to convert into a display case, I really wanted to salvage the exhibitor plaques and railway memorabilia that decorated the timber fascia on the layout. Fortunately they were all applied with either double-sided adhesive tape, or had been screwed and glued using a few blobs of clear silicone adhesive. It took some time to use the same extended hobby knife to shimmy them free, but they came away without any damage. After cleaning the tape residue from the back of each one, are all now safely packed away, ready to be re-mounted and displayed on the next layout.

Trees, buildings, signs and whatever else could be salvaged for my bits-and-bobs box came next.

Unlike the station and goods shed, the cement plant and signal box were glued firmly into position. To remove the signal box I first saturated the area around it with soapy dish wash liquid, and used a stiff knife to cut around the edge of the foundations and pry the little building away in one section. It suffered only a little damage to the base beneath the stairwell, something which will easily be hidden with some ballast when next gluing it alongside the railway tracks. The cement plant however was fused to the plywood base from a combination of balsa cement and PVA white glue which had managed to seep between the scenery and the base of the building. It finally came free after a cracking sound followed by a light shower of tiny handrails that came loose from the tower feeder and top of the silo. I'll need to make some repairs with some plastic cement if it were to be re-used in the future.

Before cutting the layout into scrap sized pieces, I removed all wires and steel hooks from beneath, and made cuts through the track where I would run a jigsaw through the baseboard. With the rail joints all soldered and the points all heavily ballasted right up to the delicate switchblades, I decided against wasting any further time trying to soak, cut and pry the few turnouts loose from the layout. Finally, my wife Denise and I carried the six foot long section of layout down the stairs for the final time, and the jigsaw took care of the rest.

Another former layout destined for the dump.

Cutting up a layout isn't a fun feeling. But neither was not being able to sell it. I'm now two from four when it comes to selling completed layouts, and it seems the bigger they are, the harder they are to sell. With the layout no longer standing in our apartment, and moving boxes quickly beginning to accumulate, the excitement about building the next one strangely isn't there. I guess its going to take getting the house move out of the way first to see if it returns.

As always when faced with starting over, there's usually a list of notes as to what you would do better or differently next time. Building this layout has left me with plenty of ideas.


A model railway market that is so niche as Australia has never had it better. Thanks to trailblazers in the hobby who 20 years ago pioneered ready-to-run accurate plastic models of Australian trains, I do believe we are enjoying a golden era of model railways in Australia. Yet as everything quickly becomes DCC, sound equipped, more highly detailed and expensive than ever before, I wonder where the jumping off point will come for those in the hobby. Like real estate, there eventually comes a point where the average Joe simply can't afford to build that dream model railroad anymore. What happens then? Well, I hope that I've managed to offer something to the hobby in showing that a small bookshelf layout can still offer an alternative that's at least better than nothing!

While I've toyed with the idea of starting another blog to outline my next layout, ultimately I decided not to. In the four years that I've documented Philden's construction and progress, my own author blog over at phillipoverton.blogspot.com.au has fallen by the wayside. I've more books to write, promote and generate sales for, and despite the railway books I've published over the past few years, a blog such as this sends very little traffic the way of my book sites. Another how-to model railway blog only seems like more of the same, and my time has since become very precious to me. Especially if I'm going to balance writing that elusive New York Times Bestselling novel and trying to finish my next Aussie model railway layout. So why not follow it instead? I'll soon be once more concentrating on sharing my Lineside Liaisons posts featuring the railway photography from my current and forthcoming books. And I promise I won't make you pre-order any of them!

May 2019, and the curtains come down on a layout that has been a pleasure to build and operate. Adieu!

So I've arrived at the end of the line. The part where I thank all who have taken the time to read and follow the goings-on of a layout that satisfied my desire to build a HO scale Australian outline model railroad after 30 years of modelling U.S. N scale. Along the way I've shared what has worked, and what hasn't. For all the nice comments on this blog I say thank you. To everyone who enjoyed seeing it in person at a model railway exhibition, I hope it gave you some entertainment value. To the rude bloke at the Gold Coast Show in 2017 who commented that it was a waste of space and shouldn't even be there, I say Ppphhhlllttt!!!

Any layout comes with its own unique challenges, and taking this layout to no less than 8 model train shows when there were 5 flights of stairs to go down when I left, and the same 5 flights of stairs to lug it back up when I returned was my greatest challenge. To that I'm forever grateful to my wife Denise. Having her beside me at each model train made this 'our' layout. And strangely enough, long after I've sold off all the models that won't be making their way onto my next layout, her collection of Swarovski earings that I bought her as a reward for each model train exhibition we did will live on as a lasting reminder of how much fun we turned this into.

And finally, what does one do with a blog about a model railroad that no longer exists? My guess is you do nothing. Much like the books I've written in the past, I'll just let this blog be, and hope that it gets discovered or re-discovered by other model train enthusiasts in the years to come. Hopefully I've left behind some helpful insights into how you too can build a nice bookshelf layout such as Philden.

Why did I do it? Because I love the hobby, and I'm sure I'll be back at an exhibition soon with a new layout to share.

Cheers,
Phillip O

See also; Exhibiton #8 Brisbane Finale

Saturday 2 March 2019

A full XPT schedule


What a week it has been! Hot on the heels of adding an XPT set to Philden was the news of Auscision Models' arrival of their long awaited 442 Class loco. So after a Friday afternoon of running XPT's to and from Philden and Phills Harbour, I thought I should explain how I transform running a train back-and-forth on a 9 foot bookshelf layout into something so much more, before this blog gets overrun with pictures of the new locos which are headed my way.

Actual timetables from the era you are modelling can be so much more than just a reference tool.

Just as I do with my 2 car Xplorer train, I begin by selecting a random Countrylink timetable, in this case from September 2003. Collecting timetables from the era I model is another extension of the hobby that I enjoy, and in this instance I've grabbed the North Coast timetable. As my operating session is taking place on a Friday afternoon, I scan through the timetable to find a starting point and time for my simulated 7 day sequence. Sure enough, back in 2003 the next departure time is for Countrylink's service 004 The Murwillumbah XPT departing Murwillumbah at 9.50 pm. From this point I now have 7 days to have this XPT set returned to Murwillumbah in time for next Friday's departure at the same time. All while making as many trips as I possibly can without overlapping any arrival and departure times. The challenge is to maximize the amount of trips and station stops the XPT set can make and minimize the amount of down-time the set will accumulate between runs, all while making the scheduled stops listed on the timetable. Its a challenge that can yield different results every time I try this.

Stations were designed to be more than viewing platforms for passing trains, so enjoy making your trains actually stop.

Phills Harbour momentarily becomes Murwillumbah and Philden at the other end of the layout becomes the next stop, Mullumbimby, as I work the train back-and-forth while making all the stops listed on the timetable on the up service to Sydney's Central Station. Train 004's arrival is at 11.38 am the next day. The next Saturday service the train can realistically be serviced and turned around to work is Train 001, the 4.24 pm overnight Brisbane XPT. So its back up the North Coast we go, with Philden and Phills Harbour once more filling in for each station shown on the timetable before arriving in Brisbane on Sunday morning at 6.35 am. Here the train is refueled and returns south as Train 002, departing at 7.30 am and arriving in Sydney at 9.51 pm Sunday evening.

One of my highlights is making the trains slow to a smooth stop at the platform.

Monday morning sees the same set head west, this time on Train 427, the Dubbo XPT. Departure from Sydney is at 7.10 am with arrival in Dubbo at 1.40 pm. The same XPT set returns as Train 428, departing Dubbo at 2.10 pm and arriving back in Sydney at 8.48 pm Monday night. Tuesday morning 7.43 am, and the XPT forms Train 603, the 'Daylight' Melbourne XPT, arriving in the Victorian capital at 6.15 pm that same evening before returning at 7.45 pm as Train 602, the 'Overnight' Melbourne XPT arriving back in Sydney Wednesday morning at 6.25 am.

A physical timetable to hold in your hand lends a sense of attachment to the model train you are running.

About this time, my wife interrupts to ask if I'd like a cup of coffee while I'm 'playing trains'. I consult the on-board services section of my timetable and inform her that coffee is available from the buffet car which happens to be Car D on my XPT set. She returns minutes later and tries to charge me $4 for it. Anyways, Train 005 is now ready for departure from Sydney, the 11.35 am Grafton XPT arriving in the north of the state at 10.00 pm Wednesday evening. After an overnight layover in Grafton, it departs at 6.30 am the next morning as Train 006 arriving back in Sydney Thursday afternoon at 4.34 pm. Friday morning and you guessed it, 7.15 am sees the departure of Train 003, the Murwillumbah XPT which will arrive back where we started at 9.00 pm that evening, bringing to an end my 7 day schedule.

Crew changes, refueling and overnight lay-overs between services all add to the realism of running passenger trains.

By now, more than an hour has passed without my having to worry about a fast-clock or timing the departures of each train. From my laptop, I'll play a station announcement prior to the departure of each new service, and randomly play an XPT sound clip featuring the train's twin air-horns and passing diesel rumble to add to the scene. By the time I've finished my $4 cup of coffee, I'm ready to call it a day from running the passenger train. The next time I power up the layout, I'll pull a different Countrylink timetable from my collection, an depending on the time and day, end up with a completely different sequence as I try to coordinate a schedule without any pre-planning.

Operating is probably the most enjoyable aspect of a model railway once the layout is complete, and adding some form of realistic attachment between your layout and the way it is operated becomes just as important as the scenery. I've found with a point-to-point layout that I prefer running my passenger trains in the manner I've outlined above, rather than the more traditional approach of drawing my own chart that would effectively only shows arrivals and departures of trains running between Philden and Phills Harbour. But I suppose it is a case of each to their own. If you find something that works, and makes operating your layout more enjoyable than simply making your trains move, then you're onto a winner!

See also; Running some Countrylink Timetables and Snacks for operating sessions

Sunday 24 February 2019

Phills Harbour Opening Celebrations

The 1st train to Phills Harbour breaks through the commemorative banner on my new Beach Extension.

The Champagne has been popped, (all 3 bottles of it), and the first train has rolled into Phills Harbour Railway Station on Australia's New South Wales North Coast. Wine time and model trains have never been such good friends as what they were on Sunday 24th February, 2019.


A year after rebuilding the staging shelf that was an important part of Philden, the new Beach Extension has proven to be a far worthier addition than the two stub-ended tracks it replaced. While still performing exactly as a two track staging yard should, this new section of my layout now gives me a greater sense of operating pleasure. It now feels like my trains go somewhere, even if it is just 9 feet down the line from Philden to Phills Harbour. So to mark the occasion, I once more created a banner for the first train to run through.

But first the waiting room needed to be populated with waiting passengers.

First I needed to populate the Travel Centre's waiting room with passengers, and while I had bought 100 of them off eBay for something like 10 cents each including postage, more than half fell into the category of looking rather bodgy. Fortunately it only took 35 of the tiny figurines to make the platform and waiting room look busy without over-doing the scene. So I simply placed the better figures in the more visible areas and glued the less detailed figures toward the back of the waiting room.

There are 25 passengers spread out in the waiting room inside my Countrylink Travel Centre.

While there are a further 10 passengers on the platform and the ramp leading up to the station.

The HO scale figurines, (although by no means from the top level of painted figurines that are available), really enhance the station scene. Along with some wheelie bins and painted blue Countrylink benches that I glued on the platform, the station scene captures a little of that modern New South Wales railway look I was after.

The anticipation builds as evening falls at Phills Harbour. The first train is less than an hour away.

Returning our attention to the encroaching evening, with the lights on at the station I was reminded of my own memories of train watching in New South Wales whenever I'm holidaying that way. Apart from the morning XPT from Brisbane to Sydney, most of the passenger trains that call at stations along the North Coast do so at night, and Phills Harbour when lit up seems to evoke that sense of overnight train travel that now seems almost forgotten to travelers whom board flights expecting to get there that same day or evening. Night operating sessions are going to be something that I indulge in more often now that my layout extension is complete. In my opinion it only conveys a stronger sense of atmosphere than if I had left the lights on.

A sole visitor checks out the beach from the subway beneath the station, oblivious to the history about to unfold above.

Speaking of atmosphere, I wanted to include some figures standing by the entrance to the subway tunnel that leads to the beach beneath the railway tracks, but by the time I remembered I only had one suitable figurine left that wasn't already glued in place. Under lights however, a sole figure standing alone at the end of a subway tunnel draws more attention than in daylight. So I'm leaving her be. I've named her Jenny from the block, and her presence raises more questions than it adds detail. Who is she? Why is she walking alone after dark? Is she safe? Or is she a ghost?

Sometimes the best mini-scenes that emerge on a model railway aren't necessarily the ones we set out to create. As a writer, I find it fascinating to see this tiny figurine appear in my photos, like in the one below.

A moment in history as an Xplorer service becomes the first train to arrive at Phills Harbour Station, 24 February, 2019.

So with the first train having already been and gone, the bottles of bubbles long empty by 10.30 pm, and the Ohio State Marching Band on their flight back to the U.S.A., calmness has once more descended over the seaside city of Phills Harbour. I want to thank my wife Denise for being the train driver for the evening as I filmed the historic occasion, and also my son Brandon for being the sound guy and cuing the station announcements and marching band music under much duress, (sorry Champ). I now have two nice railway stations to run my trains between and nothing for me to have to worry about ahead of this years Brisbane Model Train Show....

....All except for Jenny on the block.

See also; Completing the Beach Extension

Wednesday 20 February 2019

Completing the Beach Extension


The lights are on, the beach extension is finished. Inside the wide spaces of the Phills Harbour Travel Centre, the cleaners are seeing to the finishing touches ahead of the grand opening celebrations this weekend for the arrival of the first Countrylink Xplorer service from Sydney's Central Station. The glass is fingerprint free, the platform clean and the toilets smell lemony-fresh. The air-conditioning is keeping the waiting room at a refreshing 22 degrees Celcius while outside the humidity lingers in a sticky evening that still lurks around 30 degrees. Its the peak of summer in Australia, and soon holidaymakers will be arriving on the New South Wales North Coast by the train load.

I test-fit and sanded the edges of the perspex smooth before removing the protective wrap.

A year ago to the day, I posted my first blog entry regarding the start of construction on my new Beach Extension. Three-hundred-and-sixty-five days later, I'm ready to run my first train. The past week has seen a flurry of activity take place on Philden, as I made sure I had everything finished ahead of this May's Brisbane Model Train Show. I began with getting the 3 mm perspex panels cut from ASAP Plastics here in Caloundra. The perspex for this little project cost me only $15. The main front panel will be removable the same as the main body of the layout. This will enable me to slide it out when operating, but also slide the perspex back in place once finished so that my layout stays undisturbed and dust-free until I next use it. The side or corner panel however, I glued in semi-permanently. While I built the extension to allow for a further extension, I don't see any more space magically becoming available in the next few years. By gluing it in place with some shower screen silicone sealant, it can stop my trains from running over the edge for as long as is needed.

I semi-permanently affixed the corner perspex panel with some all-purpose silicone sealant.

The thin panel will stop trains taking a dive from off the layout, but also allows the possibility to expand in the future.

The removable perspex front matches the rest of the layout and will ensure it stays dust-free when not being used.

With the cabinetry of the layout now looking complete, I had to turn my attention to what I find is the most dreaded part or this hobby. Wiring! Fortunately, while simultaneously working on my slightly smaller N scale layout over the summer, it is something that I am beginning to conquer. Armed with a new soldering iron, I just decided to get stuck into it, and ended up giving the underside of my layout an overhaul from end-to-end, complete with new LED's where a couple had stopped working, and of course installing the new lighting on the Beach Extension.

I next removed the perspex panel and backdrop to work on adding lighting to the modern station scene...

...and gave the entire wiring beneath my layout a good tidy-up including adding these self-adhesive wiring clips.

While adding lights to Phills Harbour, I also removed some from Philden and covered the holes with some grass tufts.

Before flicking on the Beach Extension's new lights, there were a few repairs to make on Philden courtesy of taking my layout on the road four times and moving house over the course of 2018. Despite being extra careful each time the layout is taken apart, there's always the risk of a hand catching on one of those tiny wires when loading it in and out of a hatchback. There was also one area where one of the lamp posts beside the signal box shone too brightly on my newly installed backdrop. So the lamp post came out to replace another which had stopped working on the platform at Philden. Another lamp post beside the goods shed had a wire broken from the layout's last outing, so I just took the sucker out altogether and patched the holes in the layout with clumps of stick-on grass tufts I had left over. Problem solved.

The photo above also shows the area between the signal box and the gum tree where I have something else planned for after Philden comes back from this year's Brisbane Model Train Show. By keeping some small projects in mind for the future, I'm finding my layout still feels fresh and exciting two years after it first went on public display. I won't say too much about what will go here, other than it will involve one of Craig Mackie's famous Hills Hoist clotheslines and another of Stu Walker's model train buildings kits, so stay tuned.

Lights on at an empty station, but all that is about to change this weekend once the first train arrives so stay tuned!

Finally I plugged in the accessories lead and stood back to admire the end result. From the warm white LED's inside the Travel Centre to the cool white LED's on the platform lamp posts, the scene was bathed in the kind of atmosphere I was aiming for. Only with no-one hanging around the station to witness it. Take a good look at the above and top photos of the Travel Centre. It will be the last time you see it empty. Arriving in the post last week were 100 scale figurines, all of whom will soon be standing at the platform and inside the Travel Centre waiting to board the train to Sydney. I may have to take a few more shots of the empty platform and waiting room for future references. They might help paint a story in pictures of some timetable nights I plan to run.

So this weekend is shaping as an important milestone. Not only will I populate Phills Harbour with a throng of waiting passengers, but I should also complete the final wiring for the N scale layout which is taking shape beneath it, and get the first train running!

The as yet unnamed and undocumented N scale layout is proving to be a great accompaniment to what has begun as a fantastic 2019. I should have the N scale layout finished by year's end to replace Philden on the exhibition circuit in South East Queensland for 2020.

Also causing a growing sense of excitement, is the pending arrival of Auscision Model's 442 Class locos that I've been looking forward to since.... well, probably not long after I started building this layout. The CFCLA JL Class and the Northern Rivers 422 Class which should follow not long behind it will probably be it for me. Very soon I will sit down to finalize some kind of operating sequence for Philden & Phills Harbour, and my only fear is that I may have too many wagons to operate freely without having to rotate rollingstock on and off the layout, (which is about as much fun as packing up after a model train show). If that ends up being the case, I think I'd be happy to let some items go on eBay to free up some money for my next QR 12mm gauge project.

But if I had to say that there is one more NSW HO scale item that has tempted me from day dot, it has been the Auscision XPT. I know, I know, it is a 7 car set counting the XP power cars which is waaayyy too long for my layout. But my favourite train to photograph is about to be retired in the coming years, and to have a model of one to remember it by, even if it is more nostalgic than practical for a 9 foot long bookshelf layout, is still an enticing proposition. But $1200 for a model that I'd only be able to run up and back as a 4 car set at most.... that's a big ask. The kind of when I win lotto scenario. Still, both Countrylink State Rail era sets are still available, and if I indeed do move on some other items, and perhaps a few of the XPT carriages that I won't need as well, then anything's possible. It would make for one helluva last addition to my layout!

I guess that's the thing about model railways. Like the trains themselves they're always coming and going and somehow managing to stay fresh and interesting. I suppose the next thing is to see how Phills Harbour copes with opening day. I'd better get those tweezers and the super glue ready!

See also: Beach Extension Part One: When paint doesn't match

Sunday 6 January 2019

Capturing memories in miniature


Model railways are really just about re-creating memories in miniature. Whether its childhood memories of trips on trains, a working recreation of a railroad's good-old-days, or in the case of my beach extension, simply capturing the look and feel of era you remember fondly. So fresh back from my Christmas holiday break down south in Coffs Harbour, New South Wales, its time to unveil the final stage of my year-long project to turn my two track staging yard... into a two track stand alone scene.

Grafton Railway Station on the NSW North Coast line was the inspiration for the brickwork on my new station.

The far North Coast of New South Wales can be a lonely place for train watching. Most of the steel and intermodal trains either arrive or depart from Brisbane at night, leaving only the Brisbane XPT as the sole train to make a regular appearance in daylight between Coffs Harbour and the border. The Murwillumbah Line is largely overgrown since last seeing a train in 2004, and the Pacific Highway now bypasses many of the towns you once slowed down to drive through. Grafton was always the one railway town you could rely on to spot a train south of the Queensland border while making a highway stop at McDonalds. Not anymore. My last two stops at Grafton have yielded no sight of a train at the sugar silo or station, and once the next 155 km Pacific Highway upgrade between Ballina and Woolgoolga opens in 2020, Grafton will lay well off the highway and Maccas stops will become a thing of the past. So the station building became the first point of inspiration on my station scene. Those memories become part of the scene thanks to my copying the brickwork pattern on the modern railway station.

A flat roof needs something to add some detail, so I added this row of air-conditioner units and a skylight.

With the brickwork and station interior finished, (right down to copying Grafton Station's two strips of dark coloured brick), I found some catalogue pictures of some Daikin roof-mounted air-conditioner units, printed them out, covered them with some clear adhesive film and glued them to a strip of styrene. The mounting brackets are simply unpainted 1/16" styrene rod. I also added a skylight using a painted window frame I salvaged from leftovers from my cement plant I built 3 years ago, proving it pays not to throw anything out.

I next cut and glued the clear styrene windows into place where I'd intentionally left the grey spaces unpainted.

Before giving the roof its final treatment, I sealed the edges so that no glue would ruin the inside detail.

The inspiration for my roof came from our holiday accommodation at Pacific Cove Resort, Coffs Harbour.

I went with something different for the roof of the Travel Centre. Referring to some previous holiday photos from our family trips to Coffs Harbour, I wanted to copy the stone roof effect that is used on the Wyndham Terraces apartments in the Pacific Cove Resort at Coffs Harbour. This was our fifth family holiday to Coffs Harbour and our first one was back in.... you guessed it, 2005. Perhaps this is another reason I chose to set my layout in the 2002-2005 period, and it become the second point of inspiration for my station scene.

The roof stones on the Travel Centre are the same Woodlands Scenics coarse light grey ballast I used on my mainline.

I quite like the finished result. It makes you stop and think, 'where have I seen that before?'

Coffs Harbour Railway Station's large sign, flat roof and air-conditioning structures were my next point of inspiration.

A lot changes in a decade without you realising. Although Coffs Harbour Railway Station on the NSW North Coast Line still looked pretty much the same when I called in over my Christmas 2018 holiday break, the giant Countrylink station sign out the front that I'd photographed above just 4 years earlier in 2014 was gone, replaced by an orange sign with a simple 'T' for train, (as if we didn't already know). It shows how the things we take for granted today can become interesting modelling points for tomorrow. The sign became my third point of inspiration. I simply had to model the blue Countrylink sign on my beach extension.

I made the signs following my own instructions on my post Adding Railway Station signs from back in 2015.

I also added some MIND THE GAP stencilling alongside where the doors of my 2 car Xplorer will pull up.

There is just enough room for me to add a model of a Countrylink road coach when someone decides to release one.

The finished Phills Harbour Countrylink Travel Centre complete with platform and signage.

Trying to photograph the now complete station and platform quickly showed up something I didn't like. Where the backdrop of Coffs Harbour meets the painted blue sky at the end of the line seemed to detract from the overall scene. Revisiting my own post adding the layout backdrop from 2018, I figured I could extend the backdrop scene by matching the mountain line of the photo I'd used as the backdrop on my beach extension. Fortunately, I had a lot of photos I'd taken of Coffs Harbour on that same day, and decided to use one that featured a scene of the Coffs Harbour Marina in the foreground. Returning to Officeworks, this time it cost me only $6.50 to print my re-sized photo on the EZ-Tac adhesive.

The EZ-Tac print was measured, cut and test fit before removing the adhesive backing and pressing it into place.

The extended backdrop instantly improved the scene, but something need to be done about that corner join!

I used these hops plants that I'd purchased from Modellers Warehouse at a model train show.

Gluing them to the height of the tree on either side of the square channel that holds the backdrop in place worked.

The lower waterline on the backdrop makes the railway line look like it ends on a wharf above the marina.

Looking back towards the mouse-hole. I've now turned what was a plain staging shelf into this nice little scene.

So the cleverly named Phills Harbour (coughs) is now complete. The only thing remaining to be done is to add a few lights, to the station building, platform and subway tunnel leading to the beach, and some passengers waiting on the platform and inside the air-conditioned coolness of the Travel Centre for the next train to Sydney. Compare the scene above to the view below of what these two staging tracks once looked like. The two tracks essentially do the same thing they've always done, provide a staging area for trains while I operate the main area of the layout.

Flashback to when these two tracks were simply just staging for my bookshelf layout.

The finished beach extension, ready for opening day!

If model railroading is really just about capturing a memory in miniature, the only person who can really judge the end result is the modeller themselves. Although there was really nothing wrong with the original two track staging shelf, what rebuilding this end of my layout has done is provide my small layout with a lot more memories. Memories of chasing trains along the north coast on the way to our holiday.

See also; Phills Harbour Travel Centre and Adding the layout backdrop