Showing posts with label Philden Beach. Show all posts

Friday 13 August 2021

The Philden Road Finale

...or the one about whatever became of that Queensland narrow guage and NSW North Coast layout you said you were building?


Its exactly 4 months to the day since I last posted on where I was up to with my Philden Road layout, and a little under 2 years since I first mentioned my new North Coast layout's plans, way back in October of 2019. So I guess the question is, what has happened to Philden Road?


Well... a lot. Or maybe nothing. Or maybe you can just put this all down to life as we know it in 2021, but...


With 3 different layout projects underway in various stages of construction, and with all the structures still needing to be completed for Philden Road, I'd reached the point where I had to ask myself just how much time I had to invest into completing the rest of this layout versus completing everthing else.


Before I could answer, life dictated what would follow. My wife had already been off work with a back injury since the end of March, and despite downsizing my model train collection earlier in the year to help us through the medical costs and associated physio sessions, a second Doctor's opinion and MRI scan in May brought the bad news that she wouldn't be able to resume any form of physical work, ever! From the end of March I'd been perservering with running our cleaning business on my own in the hope she'd eventually return in some capacity. By June the long days, sometimes 3 am to 8 pm, were proving too much, and I had to downsize the business to a one person operation, which we did at the End of Financial Year.


The extra time required to run the business on my own coupled with a downturn in income wasn't very conducive to starting any new layout projects, and here I was with 3 layouts in various states of construction when I barely had the time to work on one!


The last standard guage departure leaves the Harbour back in April 2021.


In the meanwhile, I had fellow modeller and good friend Anthony Veness visit for a short operating session and catch-up, and we soon got talking about all of the would-of, should-have and could-have missed opportunities when it came to my new bookshelf layout. Though the layout was running nicely, there were just one too many nuances with operating it, (namely the Queensland line) that were begging for a partial rebuild in order to fix the issues. I had to agree with him in that opening up the ends of this layout and building it as a continual run loop was the best way to realise the layout's operating potential when it came to siding length, industries etc. The problem was that I didn't have that amount of space available, nor was likely to in the next ten years. It was all just wishful thinking. I also didn't feel like committing the precious little time I now had left into reconfiguring Philden Road again.


I finally reached that 'shut it down' moment. Time-wise, money-wise and for my own sanity, something had to give. I chose to scale back, sell-off and not sink anymore time into Philden Road.


So a deal was struck. Philden Road would pass into Anthony's more than capable hands to incorporate the two modules into his own plans. We'd always talked about doing a layout project together, and this was just a matter of lifting the two modules off the framework above my desk, and taking them for a car ride a little farther north up the Sunshine Coast. In return, Anthony at some point in the future would help me with work on a little micro layout as a replacement for my Queensland line.


I then packed up all my HOn3.5 scale Wuiske Models locomotives and rollingstock ready for when I get the new Queensland micro up and running, and put almost everything else aside to sell on eBay or through Facebook groups.


It is also Adios to my N scale layout which has sat incomplete beneath Philden Road.


The next 'shut it down' call came with my stalled N scale layout that sat beneath Philden Road. After 12 months had lapsed without a blog update or any progress on a project that had already changed settings more than once, it actually felt like a relief to pull the plug on it. I originally sold the layout through a Facebook group, only for the Greater Brisbane and Sunshine Coast areas go into COVID enforced lockdown. After sitting in my garage for seven weeks, the sale ultimately fell through. I then re-listed it and just 3 days later the same thing happened, Brisbane went into lockdown again meaning no-one could come pick it up anyway. I'm so over the all these COVID-19 restrictions and snap lockdowns, and I guess it showed. The next day I stuck the layout on the garage floor and cut it all up!


While I couldn't save much of the N scale KATO unitrack, with a week at home at the insistance of the Queensland Government, I cut the layout length ways down the middle, added a new L-girder to the front and a coat of paint, and soon had a new 4' foot 10" long blank Queensland layout board to show for my time. The rest went into the wheelie bin. At 1490 mm x 350 mm it simply slotted back into place where the N scale layout previously stood beneath Philden Road. Problem solved!


That's the re-purposed N scale layout (below), and the new HO replacement for Philden Road (above).


That left the 'other project' I had been planning for when Philden Road was finished. Despite it consisting only of a couple of sheets of plywood leaning against the wall in the garage, and a few models tucked away in my wardrobe, in the light of everything that was unfolding around me, it was the one idea that I was most keen to pursue. But given how 2021 was playing out, I had to first cost the whole exercise in my head when it came to the time and money it would require.


Timewise; it was certainly doable, if I refrained from blogging its step-by-step progress and simply put any precious spare time into building it. Costwise; I'd come out thousands of dollars in front, by the time I sold-off the no longer required locomotives and rollingstock from both Philden Road and my now obselete N scale plans. Operations-wise; abandoning the idea of including passenger operations and a station scene, and instead building a freight-only layout with a proper staging yard, would fix all the operational shortfalls I'd encountered due to limited space with the previous Philden layouts. A small freight-only bookshelf layout would also only require a minimum sized locomotive and rollingstock fleet, which in the long-term would provide more bang-for-my-buck.


The sell-off allowed me to purchase the missing track, timber and paint I needed to build the new project, add a few new locomotives from which to base the new layout around, and still be able to put a few thousand dollars back into our bank account which has helped us greatly. Knowing that this may also be the last new layout I afford to start for quite some time, I've taken extra care to ensure I build Philden Road's replacement with both interest levels and operational longevity in mind. It needs to still be interesting and reliable to operate in 4, 5 or 6 years from now.


The control shelf was amongst the final improvements made to Philden Road.


The Harbour scene was left incomplete as it will be redeveloped by its new owner.


As you're reading this, the new layout has already taken Philden Road's place atop the framework over my desk area. Its been built to the same width and length as my existing stand alone frame, only this time the shadow-box style layout's backdrop is a more pleasing 450 mm high. Trains are already running on the scenic section, the scenery is almost 100% complete and there are only the building structures and designated staging yard to finish. In a sense the new layout has advanced to where Philden Road was back in March, which is surprising given all that I've had to do for these past 4 months in the precious little spare time I've had to do it.


Like so many others, my weekends have been spent locked away from the world, working in the garage on the layout, and only taking a break to watch the footy or Olympic Games. I suppose 2020/21 will go down as the most constructive era for new model railway layouts being built in Australia. When this whole Pandemic thingy is over, I sure there will be a multitude of new layouts on display if we ever get back to a regular model railway exhibition calendar. For now, the exhibitions only seem to be getting cancelled, which makes trying to plan time away from my business, and affording the cost of accommodation and travel near impossible in my current position. So even though I'm building everything to be able to be packed up and transported to a show in our car, it's simply for my own pleasure and not with the goal of an exhibition in mind at this stage.


So this post makes for one final hurrah for Philden Road under my ownership. The layout will live-on in a new guise, one which I'll still get the chance to be involved with behind the scenes and share updates on further down the track. It will be interesting to see how Anthony works the two modules into his own plans, and of course I'll still get to run some stuff on it whenever we get together. In the meanwhile, here's a few of Anthony's own locomotives he brought down for a short running session.


1460 shunting the Bald Rock Creek Siding and apple shed.


A 442 class SSR loco on a light engine movement across Bald Rock Creek.


Double NR Class locos returning to the Harbour.


I hope people have enjoyed following the ups and downs of my blogging this little layout's progress over the past 2 years. Through bad knees and bad storms, the layout had its share of downs more than ups, but still came close-enough to saying it was finished all the same. I guess that's all a part of modelling isn't it? There's some great people in this hobby who have kept in touch, either by phone, email or through Facebook groups, and that makes for a wonderful network to exchange research information with, or help you hunt down a long sold-out model when you really, absolutely need it. I guess it goes to show that you don't need a dedicated train room or a museum collection full of model trains to still enjoy being in this hobby. And lastly, thanks for helping this blog crack the Quarter Million views mark recently. What an achievement that has been!


The final parting shot of Philden Road, long after the last train has departed.


Now that the replacement layout for Philden Road is in place and running, I'm hoping I may even find the time needed to finish the two book projects I had started at the beginning of the year. I've also become a little more mindful of not letting myself burn-out. So if I go a few weeks without making any progress on the new layout, that's fine. I'll at least have some model trains I can shunt around the layout when I feel like it while I wait for the world to return to normal.


Whenever that may be.


Cheers! Phill O

Friday 29 January 2021

Philden Road Part Nineteen

 ...or the one about completing the overpass and setting the scene for the rest of the layout.


It's time for an update of how Philden Road is progressing. With a new layout rule in effect which states that neither line shall be placed out of service for more than 12 hours at a time, I've made considerable progress since my last update in November, all while still being able to fiddle-fart about with some small operating sessions to test that everything works as I'd envisioned. It's a case of so far so good.


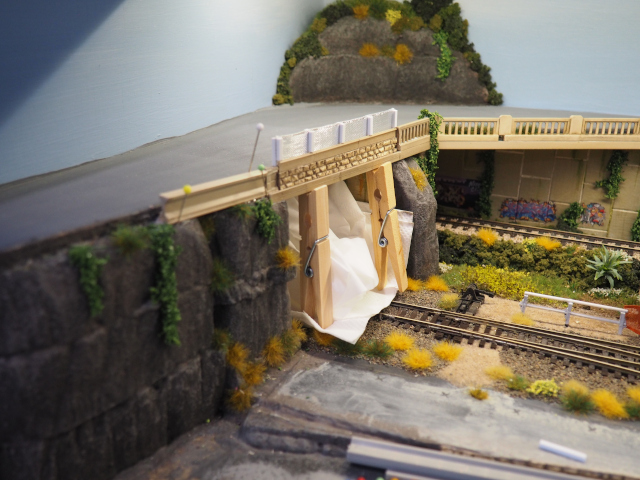
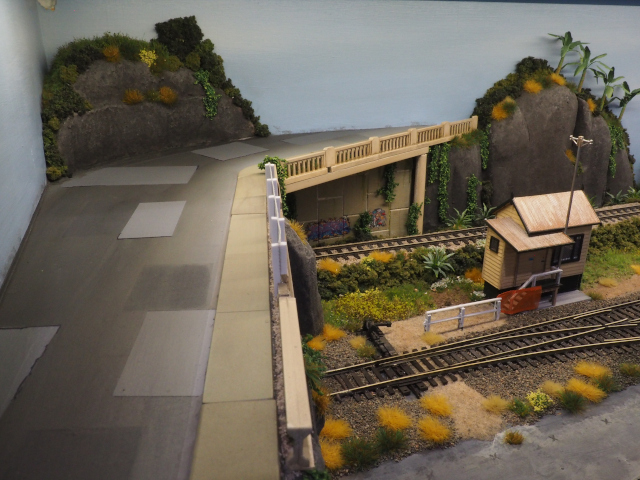
One thing that I'm beginning to admire about my approach with this layout, is that I've become less afraid to rip out a scene or redo a feature if it doesn't turn out as well as I'd expected. Case-in-point was the namesake overpass that divides the two modules of the layout. After not being happy with how the first incarnation turned out, and taking onboard a fellow modellers advice, I removed the unloved span above the NSW North Coast line and scratchbuilt a new span to blend in with the Rix highway kit section I'd used to cross the QLD narrow gauge line.


Inspiration comes from somewhere, even for a fictious layout such as this. In this instance, I wanted to replicate the rock-proof screen gaurds fixed to the ballustrade of bridge overpasses from about the mid to late 1990's to stop vandals from throwing rocks at passing trains. I'd photographed the road overpass immediately to the south of the railway station at Coffs Harbour with such a screen in place, so used this image as inspiration for my Phills Harbour scene. It is only fashioned from some strip styrene and bits and pieces from my modeller's scrap box, but the end result is something that helps set the mood for the location and era I am trying to model.


Departing south from Coffs Harbour station, this XPT is ducking beneath the Campbelltown St bridge.


I rebuilt the left side of Philden Road overpass to blend in with the Rix highway overpass kit at right.


The rock-proof fence helps set the time period and establish a focal point for this scene.


Once the ballustrade was in place, I turned my attention to the roadway. To give the road a well-worn and patched up appearance, I masked off different squares at a time with blue painter's tape, and painted several different shades of grey. Next I weathered the surface with a few passes of the airbrush using three different mixtures of thinned-down acrylic paint; Model Master reefer grey, Vallejo black wash and Vallejo engine grime wash.


The road surface is going to be prominently visible, so I put a lot of time into making it a feature.


I masked of random squares of the roadway, and painted it in different shades of asphalt.


When dry, I removed the tape, weathered the road and added a concrete sidewalk.


The effect on the roadway is amongst the best finish I have achieved to date on a road surface, and left me glad that I pried my first earlier bridge section from above the NSW North Coast line and binned it. The completed Philden Road overpass instantly set the scene for how the rest of this... err, scene, would look.


A few locomotives soon to be retired from my layout pass beneath the new look overpass.


The next area on the layout I revised was my locomotive roster, and this is one area that has since been revised further after taking these few photos! Initially I wanted to capture the changing 90's era of operations on the New South Wales North Coast line. But 1991 to 2000 is a pretty broad time period to be modelling considering that National Rail was established smack in the middle of that. Even with the locomotives that I'd collected, it soon became obvious that you can't model everything. Keeping early 1990's NSW Government owned locos such as 442 and 80 class diesels on the roster meant creating a separate rollingstock roster of appropriately lettered goods wagons to run with them. Given the scaled back nature of this project, 8 locomotives seemed totally unnecessary for a 3 to 4 track Inglenook yard. I eventually decided upon a 1997 to 2001 era, and ruled a line through any locomotive or rollingstock item that didn't belong.


That leaves me with a fleet of 3 x NR locomotives and my 2 x Northern Rivers Railroad locomotives to cover my late 1990's era, (more on these in a later post), all of which are well suited to run alongside my Countrylink XPT set. For me, my whole NSW North Coast roster is about having some of the locomotives I remembered from when I was a young lad, still working alongside some of the newer Australian horsepower of the time. As for those NR class locomotives? They marked the beginning of a new era when they burst onto the scene in 1996, around the same time that I became a Dad. The NR's, (and my kids) are now around 25 years old! Where has the time gone?


I've just found that modelling an entire decade with this layout would have drained more money from my bank account than I was comfortable with. By moving on any item that doesn't belong between 1997 and the turn of the Millenium, I can now send some money back the other way.


Deciding to leave the cement plant off was a big dilemna... I'll miss this guy's face.


After returning from my summer holiday break with a pair of fresh eyes, the next scene-changer I decided to omit was the cement plant that I'd long planned to recycle from my old layout. As much as I like the familiarity of this structure, it really overpowered the beachside scene. I had to ask myself what mood was I trying to portray with this layout. Was it the industrial seaside scene we'd just seen at Gladstone? Or did I want to capture the fun beachside vibes from past family holidays? The cement plant made it a touch difficult to reach the ground throw beside the signal box anyway. So in the end the good vibes won out. I'll now pack the cement plant carefully away once more in a box, just in case I should use it on another small project in the future.


I guess these two photos can now reside in the Phills Harbour Museum. They can serve as a flashback to the Old Days before the Phills Harbour Foreshore redevelopment of the early 1990's, in much the same way as Coffs Harbour Foreshore was redeveloped following the closure of the railway jetty.


And gone! The final photo before the big foreshore redvelopment of the 1990's.


In its place a Fish n' Chips shop and a Fishing Tackle charter company are already erecting a new two story building. While the council has just completed a concrete esplanade linking the beachfront to the jetty and railway station. The whole project involved hours of marking out paper templates and cutting and gluing 6 mm cork floor tiles to create a seamless transition along the harbour wall. And ignore the foreign Victorian loco that seems to have popped up in the above photo. It was on loan while I measured train lengths and clearances for another top secret micro-project that I have in the pipeline.


I started on the Walker Models Fish n' Chips shop and drew a paper template for the foundations.


I used the template to cut a cork floor tile, and fixed it in place with white caulk, (No More Gaps).


The cork tile needed to be pinned in place while the caulk dried overnight.


The Walker Models Fish n' Chip shop can then be built alongside the beach.


So there you have it. The overpass is essentially complete and the scene is now set for how I will build the rest of the layout. Although I've glued the sub-structures together on some of the buildings, they're not fixed in place so that I can take them off the layout and work on them at a later date, (perhaps on a table in front of the TV when footy season kicks off again). I'm building a footprint that the structures will drop into so that I can keep progressing with the scenery.


I know folks often say stuff like 'next up I'm going to start work on... (insert whatever project here),' but with this layout I'm finding I can wake up on a Saturday morning, go to the beach for a swim and a coffee, and come back not knowing what I'm in the mood to do next. I just know that as long as I do a little something each week, the layout gets that little closer to being finished.


Saturday 10 October 2020

Philden Road Part Sixteen

 ...or the one about leaving room to expand my track at a later date, and how a year like 2020 and COVID-19 has changed my plans for this layout and the next.


All the track is down, and I'm waiting only on some LED lights to arrive to begin wiring everything up beneath the layout. Just when they'll get here is anybody's guess. It is after all 2020. For a year that I think we all wish would hurry up and end, we've at least made it through to October. Even though the promise of brighter days being just around the corner is beginning to sound like a broken record.


This week I happened to re-read an old post I wrote back in March, sounding a warning to prepare for modelling lockdown, expecting to cringe as I sometimes do. Only it turned out I was right. While we're fortunate up here in Queensland to be enjoying something that resembles a normal life, both my sisters in Victoria have been in lockdown since July 8. Its no lean feat considering they've each been homeschooling three kids while working from home.


By comparison, my wife and I have had it pretty good. We run a local small business on the Sunshine Coast and have been fortunate enough to have continued to work right through the COVID pandemic while qualifying for some Australian Government Jobkeeper assistance in the process. It enabled me to have an unprecendented amount of spare time between jobs to work on my layout while we waited for things to return to normal. This week we found out what the 'new normal' is. Our business has recovered enough to no longer need any Government assistance going forward, which is great news in a way. But still being down some 15-20% compared to last years' figures means you need to look at where you can make cuts and compromises somewhere in your household budget. Turns out that hobbies are a luxury.


Laying track is the very last moment to decide what to omit, and what to include for the future.


While I was happily working away on Philden Road and feeling grateful for the list of models I have been able to purchase for the new layout this year, the reality of what is going to be the new normal for the forseeable future does make you stop and evaluate your hobby. How much do you get out of it? And how much time and money do you put into it? I'm sure I'm not the only one asking myself these questions this year.


I'd reached the point where I had laid all the track for the rationalised Phills Harbour yard arrangement that I talked about in Part Fifteen, when I stopped and thought about what next year may bring for our hobby. In some ways 2020 has been kind to Aussie modellers, with new models still being released, a plethora of still available models to choose from, and a host of sales being offered over the course of the year. It will probably go down as the year that I spent the most on my hobby, ever!


But for someone who usually only wants one or two of the same type of wagons or rollingstock on his modest layout roster, having to buy freight rollingstock in packs of four and be bothered listing, selling, packing and posting the rest on eBay has long been an expensive and rather annoying way of going about it. By the time you deduct postage costs, eBay fees and PayPal fees from the sale price of the models you move on, it often ends up to be a rather uneconomical way of going about it. I for one much prefer the individual wagon approach that everyone else in the world seems to be able to do except for Australia. Although I did snap up a few of the repackaged individual wagons that Australian Modeller had released during one of their 20% off sales. When I read that Auscision Models were having to put their prices up because of cost increases from their China factories, any thoughts of taking the same approach in the future went out the window. If a $260 4 pack of freight rollingstock has gone up $40 to $300 per pack, its a big risk to take on just to get the one new wagon you're after! And if that's the case, you can rest assured that in 2021 a $335 locomotive is going to increase at least $40 also to somewhere around $375. It seems that in 2020, plastic has just become the new brass.


One switch or turnout, if installed now, was going to future-proof any expansion plans.


I never started constructing this layout with a budget in mind, but 2020 will ensure that I now finish within budget just the same. Prices going up when household income has come down, became my jumping-off point in the hobby.


So... the solution to future-proof my hobby should I get the opportunity to expand it in the years to come, was to take one of my omitted left hand PECO turnouts and cut it into the jetty siding at an angle that steered the track towards the layout edge. As you can see below, the position will allow for a sharp right hand curved turnout should I eventually expand Philden Road into an L-shaped layout. Its a feature I didn't incorporate into my last layout Philden, and one that if I didn't incorporate now would be an opportunity lost. I can then build the jetty to the shape of the future track extension, and simply leave the rails off from the straight section of the turnout to resemble an old wharf that has had part of its' rails removed. The rails will simply join to the existing turnout if I do proceed with an extension at some point in the future.


It is a much more budget friendly outcome than planning for another layout post this one. Building materials would be minimal, as would track, and it won't require any further rollingstock or locomotives other than the ones I have now.


For now I'll cut the rails at the edge of the layout, but the switch is there should I extend in the future.


The rationalised and COVID-influenced track arrangement then came together rather quickly, and I next soldered the rail joins and wired the toggle switches to the blocks I'd created within each insulated track section. The narrow gauge tracks will operate independently from the standard gauge, with the standard gauge blocks being divided into a platform/yard precinct, a jetty precinct, (wired for both present and future) and the Saw Point visible mainline staging at the other end of the layout. I could then paint the rails up and continue with construction once more.


I airbrushed the track with 3 shades of Model Master acrylics. I'm starting to love my airbrish!


I stuck blue painters tape over every pair of point blades before airbrushing.


Finally I airbrushed the sides of the cork tiles in aged concrete


The completed Phills Harbour track arrangement, with a split-level QLD and NSW yard.


With the track configuration completed, I next looked at what I could recycle from my old layout. As you can see, with the platform track now flipped to face the front of the layout, there was room for me to place Philden's old station building from the August 2018 cover of Australian Model Railway Magazine beside the modern Countrylink Travel Centre that I'd built as part of my Beach Extension. I think they'll look great together as some sort of 1990's station upgrade program, and although the detailed interiors will face away from the viewer, I can still see most of it when I peer through the windows. Recycling quickly became the theme for 2020, and the signal box from Philden will soon occupy the area to the left of photo between the NSW and QLD lines.


Next up, I had to come up with something that would future-proof my interest in the layout long after it is finished. The track arrangement had already been simplified to the point where the operational aspect was effected also. So I turned to YouTube and an excellent video put together by Steve's Trains. If you haven't seen his small layout videos or the 21 part series on building the Tulsa Spur, check it out. It's a track plan I would gladly have copied if it wasn't for me trying to incorporate two layouts in one.


Instead of just having a 3 track yard alongside Phills Harbour station, Steve's warehouse idea would give my QLD line a sense of purpose, by moving loaded fruit wagons from the siding at the Saw Point end of the layout to the refrigerated warehouse at the Phills Harbour end. By delivering each loaded wagon to the correctly specified door, I could extend switching moves for each carded running session by as long as I'd like. The Wuiske Models QLX wagons have two doors on each model, and the Walthers Modern Cold Storage kit that features in the Tulsa Spur video above, has a modular approach to make positioning the doors easier. More importantly, I only have about 15 mm of space between the back drop and the rear siding to play with, so the kit could be built as a flat to run the full 520 mm along the rear siding, with only the rubber door seals protruding from the buildings' wall. I could construct it to have the 6 warehouse doors line up with the 3 QLX wagons that would occupy the siding, while the track beside becomes the workable siding while positioning each wagon at the correct door.


I couldn't track down this specific kit anywhere in Australia, so I had to order it direct from Walthers website and get it posted from the other side of the world. There will also be enough leftover components from the kit to kitbash a modern addition to the side of my recycled goods shed for the Saw Point siding, and whatever I decide to build as part of my jetty extension in the future. In doing so, this became my very last purchase for this HO scale bookshelf layout....ever!


With 2021 indicating that a move back to a small apartment is going to be on the cards for my wife and I following our Son's wedding, I don't know when, or even if for that matter, I'll ever get around to building the jetty extension. But at least I've included a provision to do so. 2020 on the other hand has probably killed off any plans or ideas for another Australian outline layout. At least for the next few years.


Thoughts now turn to the N scale layout that I've been constructing to sit beneath Philden Road. To future-proof my interests with it, I've moved the setting from Canada's canyons to an urban scene on the fringe of Chicago. Modelling an urban scene with a lot of structures is going to take a lot longer to complete. And I find building structures is a more enjoyable aspect of the hobby compared to building benchwork or wiring. So with my existing fleet of Canadian Pacific locomotives and modern-era rollingstock, I've gone and aquired a Chicago Metra passenger set and an armful of N scale Walthers kits. That little bit of spending now, will need to justify a whole lot of non-spending in the years to come! Especially considering N scale prices in America are now jumping through the roof also! However, I was lucky enough to find online a Metra Operation North Pole Christmas set marked down by 40% and buy the last one.


It will be nice to rekindle my fascination with Chicago railroading, given that my first exhibition quality layout was my C&NW Overton Subdivision back in 2002! And as a whole, My QLD/NSW Philden Road layout, and the CP/Metra as yet unamed Chicago layout beneath it, will provide me with a whole lot of fun in the years to come, without taking up any more space or budget. But as usual, I'll let that be a story for another day!


Thursday 9 January 2020

Philden Road Part Seven

...or the one about the blank canvas phobia


Wow. What a difference a week has made. Having a few spare hours in the middle of a work day, courtesy of one of our clients who are yet to return from their Christmas break, meant I was able to assemble the finished benchwork for Philden Road above my work space area. As you can see in the above photo, choosing to paint the timber with white water-based gloss enamel has matched the framework for the new layout perfectly with my existing IKEA furniture. The only thing left for me to do is replace the borrowed dining room chair, with a white and birch office chair from... you guessed it, IKEA. I can then get onto building the two modules that will form the new layout that will sit atop the benchwork. Perhaps.

I say perhaps, because as I stand back to admire the benchwork that my wife Denise and I painted over our summer vacation at home, all those second thoughts regarding final trackplans, levels and making it all fit start creeping into your head. I call it blank canvas phobia.

To outline what I'm intending to do for the sake of those who are new to this blog, over the course of 2019, I effectively dismantled a 2.7 metre long x 320 mm wide bookshelf layout that had graced the cover of Australian Model Railway Magazine, and began the task of replacing it with a 3.3 metre long x 450 mm wide multi-level bookshelf layout. The layout needed to be able to fit into the back of a mid-sized hatchback or SUV, and so was designed to break apart into two 1.65 metre long sections so as to not limit our choice of vehicle when it comes time to updating our car in the near future. The two modules in turn will rest atop the seperate benchwork that you can already see in the above photo. The benchwork itself comes apart in five sections and is held together by just 7 bolts with wingnuts. It takes less than two minutes to erect and will be a huge timesaver when I take the finished layout to a model train exhibition sometime in the future.

I haven't shown the trackplan for the new layout yet, as I have three such versions drawn to 1:1 size on rolls of paper. With my plans calling for a Queensland narrow guage layout to co-exist with my planned New South Wales standard guage North Coast line, a split-level approach as opposed to a multi-deck layout seems to be the order of the day. Occupying an end each, the two lines would cross in the middle, both under and over Philden Road, before disappearing behind each other's backdrop. The key requisite here is that my NSW North Coast line needs to be able to both accommodate a 5 car XPT set at a railway station platform, and still have the room to make it completely disappear from view at the other end. Hence the reason I needed to build the layout to a length of 3.3 metres.

From this point, it becomes a bit of a conundrum with what layout elements I need to omit. Add one element to the NSW end, and I need to omit one from the QR end, and vice-versa. While on one hand I'm itching to get started, until I do its easy to get lost in that beautiful moment where everything seems possible. Once those pencil lines go down on the sheets of plywood however, its a different story. Trackwork, the rise and fall of the landscape between levels, structures and the feeling of space and seperation that you need to place between each element will demmand at least one or two hard calls. For now, everything just looks good on paper.

A flashback comparison to the original Philden layout with the same IKEA funiture squashed beneath.

I guess the best way to appreciate the space I now have to work with is by comparing the photo of the new benchwork at the top of the post, with the photo of my old layout above. Not only do I have an extra 600 mm of length to play with, but I have much more leg room around my desk and work space.

The finished benchwork in place ready to begin constructing the two removable modules that will rest on top.

So while the State of Origin mind wars continue with the positioning of elements on the HO layout on top, with a spare weekend, and a small stash of timber and plywood at the ready, it may well come down to the flip of a coin to decide which end I begin working on this weekend. Either way, until you splash the first bit of paint on a blank canvas, just staring at it can be a daunting prospect. I guess you'll know which State wins out based on my next post. But as usual, that'll be a story for another day.

Monday 6 January 2020

Philden Road Part Six

...or the one about the summer of painting the layout.


Well, Twenty-twenty is well and truly underway. And by that I mean the year 2020 and not the cricket variety. Although the KFC Big Bash is a welcome way to cool down in the evening in front of the telly after a day at the beach or painting some layout benchwork in the garage! Ironic then that the team I follow happens to be the Brisbane Heat.

This year's edition of summer in Australia has been hot. Days hitting 39 degrees Celcius in Queensland, and none that I can recal dipping below 30 degrees. Which is not a problem when you live on the Sunshine Coast and can be parked at the beach and in the water in only 10 minutes. But while we are still waiting on word of when the repairs to our house will commence following November's freak hail storm that I covered in Philden Road Part Four, at least we have a roof over our heads. Unlike many Australians throughout Queensland, New South Wales, Victoria and South Australia who no longer have a home, thanks to the worst bushfire season I can recall. When you factor in loss of livestock, livelihoods and the complete devestation of some historic Aussie towns, the road to recovery for many communities is going to be a long one indeed, and it remains to be seen what impact the fires have had on our railway lines in the affected areas.

It was a slow process painting one side of each benchwork section at a time.

Back to my new layout news, and after returning from the beach this morning from my umpteenth swim of the summer, my wife helped me apply the final coat of paint to my benchwork frame. I had to enlist Denise's help with painting the layout on a sheet of cardboard on my garage floor on account of my knee still needing time to recover from the small procedure I had on it in early December. While I'm back moving around without any pain and with more range of movement in the knee than I've had for the past six years, bending down on a concrete floor for twenty minutes at a time was proving a painful exercise. Between us we'd paint one side of the leg frames and top sections, leave it standing against the wall for the day to dry, and the next morning repeat the process on the other side. It took two days to apply each coat of paint.

I used an undercoat when painting the benchwork frame, as I want the finished layout have a furniture-like finish.

I used a 100 ml can of White Knight Splashes water-based undercoat, and a 250 ml can of the White Knight Splashes water-based gloss white to paint the entire benchwork. I applied 1 coat of undercoat and 3 coats of the gloss white to the entire framework. and then took the time to lightly sandpaper the visible outer sides of the framework and apply a further 2 coats. The famework will now lean against our garage wall for the next week to harden before I re-drill the bolt holes and assemble the framework above my desk area next weekend.

The final coat applied to the five sections that will bolt back together to form the benchwork.

Finally after 6 months of frustration, I'll have a visual scope of the size that the new bookshelf layout will be. I can then get to work building the two separate modules that will sit on top of it. It might seem like going about things the long way, but if I ever decide to build another layout down the track, I only need to rebuild or replace one module at a time, and the free-standing framework will never need to be rebuilt. After retiring Philden from the exhibition circuit and stripping the layout bare, I think building the new layout this way will turn out to be a brilliant idea.

One thing I have been pleased with so far compared to when I built Philden, is that painting the layout has proven to be a whole lot easier than using a stain and varnish. There's no problem with trying to match stains when you're just painting it white to match in with my IKEA furniture that will stand beneath it.

So with holidays now officially over for me, and my knee now ready-enough to carefully return to work, I'm hoping the positive mindset of finally making some progress with the layout will continue throughout the year. Despite not getting anywhere near the amount of work done on the layout that I thought I would when we decided to holiday at home this Christmas Holidays, we're all safe and I'll soon have the skeleton of the new layout standing in our living area. Then I can roll out my plans and start cutting some plywood. I've spent the past 18 months assembling a new locomotive and rollingstock fleet, and can't wait to get them running on track so I can start shooting some photos of them for this blog.

Until next time, stay safe, and if you're not in a position to give financially to any of the bushfire appeals that are now running, then please keep our great country in your prayers. We've been coping with bushfires, floods and cyclones since before Dorothea Mackellar wrote the words 'I love a sunburnt country'. So no matter what your thoughts are on climate change, leaders and social media influencers whipping people into a frenzy... take a deep breath... and think of how you can lend a hand rather than where you can point a finger. There's probably quite a few model railway layouts in houses or back sheds that are sadly no more because of this summer. When the time comes, maybe you'll know of someone nearby you can help start over with their new layout. Trust me, it can be quite the rewarding feeling.

Monday 18 November 2019

Philden Road Part Four

...or the one about bad knees, bad luck and the badass hail storm.


Sometimes things that have absolutely nothing to do with model railroading just seem to find a way of halting progress on your layout, despite your best attempts to do otherwise. In a week when a doctor's appointment following a brush with a little old lady at the supermarket checkout revealed I have further aggravated some quadricep ligament damage in my right knee, (simply from changing the direction of my step at the last minute to avoid possibly knocking her over), Sunday afternoon's recovery session from my son's engagement party the night before soon turned into the hail storm from hell.

Hail storm, Aura estate, Sunshine Coast, Sunday 17 November 2019.

An afternoon on the front patio with a glass of bubbly whilst watching a summer storm roll in over the suburbs of Caloundra, quickly turned into a hobbled dash by Dad to bring my son's car up onto the patio to avoid getting any hail damage. By the time I closed the driver's door behind me, golf ball sized hail stones began pelting me and our entire street with a defeaning roar.

Hail storm damage, Caloundra West, Sunshine Coast, Sunday 17 November 2019.

Not content to pelt the side of my son's car anyway, the storm let loose on the front of our house, leaving the garage door dimpled and punching holes in the concrete rendering on the front of the house. Once inside, frantic calls from my son and his fiance quickly had me hobbling upstairs behind my wife to discover that 3 of the 4 upstairs windows in our bedroom were smashed, and we now had hail the size of golf balls bouncing off our bed and out into the hallway.

Free air-conditioning courtesy of a monster hailstorm that belted our suburb in Caloundra.

By the time we could grab all the buckets and towels we could find, our bed and bedroom furniture were soaked and the full force of the storm had the blinds flapping and everyone was getting struck by inward coming hailstones while stepping over broken glass to try and rescue... You guessed it. Dad's model trains which were stored under the bed.

No it wasn't a drive-by shooting by the mafia, just a Queensland summer hail storm. Sunshine Coast, 17 Nov 2019.

The hail storm was the most badass I've ever experienced, and while I was kneeling down passing my model train boxes and prized XPT set to my son to run downstairs to safety for me, his fiance and my wife were filling buckets and the esky with incoming hail stones and carefully picking up large pieces of broken glass which filled another bucket. Then just like that it was over. A bit of light rain followed, (enough to further soak the carpet), then the sun came out. And so did the gawkers, Instagramers and YouTubers who soon congregated in front of our house.

They don't build houses like they used to. What you think is concrete rendered brick turns out is just concrete papier-mache.

I think we must have been close to the worst hit house in the street, but due to the angle the storm came from and the angle our house faces the road, our house seemed to be the easiest to film. I checked on the elderly lady next door who said both she and her house were fine, and then spent the rest of the afternoon and evening cleaning up the mess. Glass all over the floor and bedding, bedside lamps and furniture all wet and needing to be wiped down and wet model train boxes waiting for me to see to. I guess it's just bad luck that the models and other train stuff that I was selling on eBay were all safely stacked by my desk downstairs waiting to be sold and posted, while my prized models for the new layout were all wet underneath our bed upstairs. The boxes ended up being slightly water damaged, but all the models inside appear to be fine. I guess I should be thankful for small mercies.

My wife Denise was fantastic, and together we had Gaffa-taped the windows with black garbage bags and booked an emergency window repair call-out while the neighbourhood continued to just mill about and walk around filming everything on their iPhones. By eight o'clock that night O'Brien glass had replaced the three broken windows, and I could then move all the furniture to vacuum the entire room and hallway on my hands and knees to ensure not even the tiniest speck of glass remained in the carpet, (broken glass has long been my pet phobia). Denise and I finally put all the bedroom furniture back in place around half past ten, and fell into bed exhausted.

Bad knees, bad luck and one helluva badass storm!

All I wanted to do today was work on my layout benchwork.

Today was supposed to be a free Monday for me to work on the layout. Instead, I thought I'd take Denise out to the Coffee Club down by Bulcock Beach in Caloundra for breakfast. All four of us were amazing when it came to securing the house and cleaning up so quickly, and driving out of our estate the morning after, the roads around Aura were lined with hail damaged cars, more houses with broken windows taped up with cardboard boxes or bags and so-called brick rendered houses littered with gunshot holes. Maybe there's a lesson in there for us model railroaders; nail some blue plastic netting over the top of silver insulation paper, smear it with 3 mm of concrete render, paint it and call it a brick rendered home. It's disgusting the corners people cut to save money yet charge the prices they do for new homes. I've built HO scale model train buildings that are stronger.

Anyway, we enjoyed the peace and quiet of a Monday morning down by a near deserted Bulcock Beach, while back in our estate tow trucks spent all day towing away vehicles with shattered windscreens and trying to sqeeze down ridiculously narrow streets past tradies' utes and glass repair trucks. Although my son's car did get some hail damage down the driver's side door panels, my quick actions at least saved his car from being declared unroadworthy. At least he can still drive it around while we decide what to do about repairing it, given there is a huge excess on the young guy's insurance and he now has a wedding to save up for.

Back at our place, the landlord arranged a building inspection this afternoon and apparently the colourbond roof is so badly beaten up and bent out of shape that the entire roof of the two storied home will have to be replaced. Sometime in the next few months. Meanwhile there is a two day wait for a call-out if you want your window repaired on the Sunshine Coast. Moral of the story; fix it first before you Facebook it!

So, with the bad luck and badass storm now out of the way, an MRI scan this week will determine what course of action to take with my knee. Fortunately our business will soon start winding down towards the Christmas break which should ease our workload, but when I had three weeks planned of simply being at home to work on the new layout, I'm still hoping I somehow get a chance to get the benchwork finished, painted and set up above the desk to start work on the layout itself instead of being told to rest up. I guess I'll learn my fate over the coming week.

Anyway, next post I'll share some good news from my son's engagement party, give an update of all things N scale and reveal the meaning behind the name of my Canadian layout. But as usual, I'll let that be a story for another day.

Till next time, keep smiling, otherwise the world will send you crazy.

Monday 11 November 2019

Philden Road Part Three

...or the one about getting the benchwork right before thinking about anything else.


Its all too easy to get carried away with thoughts of what you're going to incorporate into a new layout without first drawing some kind of plan. Blindly knocking a frame together may seem like a great place to start, but without knowing the length of layout area you have to work with, any track plan you conjure up can easily become a waste of time. Before I dared draw a plan or cut a length of timber for the new layout, I had to first work out how much room I had to display the layout and more importantly how I would transport it if I were to ever again take a layout to a model train show.

Despite having more room in our new surrounds than the small waterfront apartment that Philden once occupied, we are planning to upgrade our car in the coming year, and the last thing I wanted was for the layout to dictate what size car we could buy, or the car to dictate whether the layout could ever be taken on the road. You see, Philden was 1880 mm long, with another 800 mm of staging that later became the Beach Extension, making for a total length of 2.62 metres. Taking Philden on the road called for the front seats to be moved forward to fit the 1.88 metre long section in the back of our Ford Mondeo, making for a less than comfortable trip wherever we took the layout. Chances are that the new car might be shorter than the Mondeo.

Incorporating two distinct scenes on Philden Road called for the new layout to be longer and wider, while still being able to fit into the back of a mid-sized car with the back seats folded flat. Working on the premise of the boot access of any half decent mid-sized car being at least 900 mm wide and 1.65 metres long, I settled on building the benchwork for the new layout in two 1650 mm x 450 mm sections, giving me a total layout length of 3.3 metres and width of 450 mm. While it is longer and wider than Philden, the new layout will be much easier to fit into our current car, and less of an issue when it comes time to shop for its' vehicular replacement.

Its funny how the settled dimensions of a new layout then have a ripple effect on the rest of the decision making process. The trackplan then has to fit the active scenic areas of the layout, the active scenic area then determines the length of your sidings, and the length of your sidings then dictates what length trains you can run. With the benchwork construction progressing nicely, I could get back to thinking about everything else; the rollingstock, the structures and the topography of the scenery I wished to create. Even with more layout space to work with, surprisingly there still isn't a swathe of space to fill with structures or sidings to fill with rollingstock.

The still under construction benchwork for Philden Road is taking place in the garage.

I suppose what I got from that recognition, is that I didn't need a large amount of wagons to fill out the roster on the new layout. In fact, I still had a little too much in terms of the amount of same-type, different-numbered wagons. Which is fine by me, as I could just list them on Ebay and turn them into some more cash.

What getting the benchwork dimensions right highlighted, was just how much of our living area would be taken up by this and my Candian Canyon N scale layout that will ultimately rest beneath it. Plans for any other small layout projects I was conjuring up would honestly only be a waste of time.

I think it goes to highlight that no matter how grand your plans may be, its more important to get your benchwork right before thinking about anything else. Its strange how the new layout now seems to be taking on a less is best mentality. Fewer sidings, fewer structures and fewer rollingstock. What it does allow for, is leaving more scenic areas between key scenes, something of which I've been studying a lot of lately on other people's layouts. But until I finish sanding, painting and assembling the new benchwork, I'll let that be a story for another day.