Setting plans in concrete

There comes a time as a model railroader that you have to stop dreaming of one day building a layout, and actually start planning. And by planning, I don't mean drawing doodles on a notepad and dreaming that it will somehow magically all fit into the space provided. I mean setting your plans into concrete.
 |
| 1:1 scale track planning using printed turnouts available from PECO's website. |
When faced with the idea of limited space to construct my new HO scale layout, I could have done one of two things; 1, stuck with N scale, (which had already given me 30 years of enjoyment), or 2, start planning something that I could actually build. If a 180 cm x 30 cm shelf layout, (that's a mere 6 x 1 foot in old school measurements) sounds like a complete waste of time, think again. With another 60 cm (that's 2 foot) available for a removable shelf to act as hidden staging when the layout will be exhibited, I had a total of roughly 240 cm to play with, and scope to extend this even further if space presented itself somewhere in the future. After seeing Keith Jordan's The Patch layout featured in the 2012 edition of Great Model Railroads, I was left thinking there was no reason why an Aussie modeller such as myself couldn't adapt his plan to suit a New South Wales Railways country station and small yard.
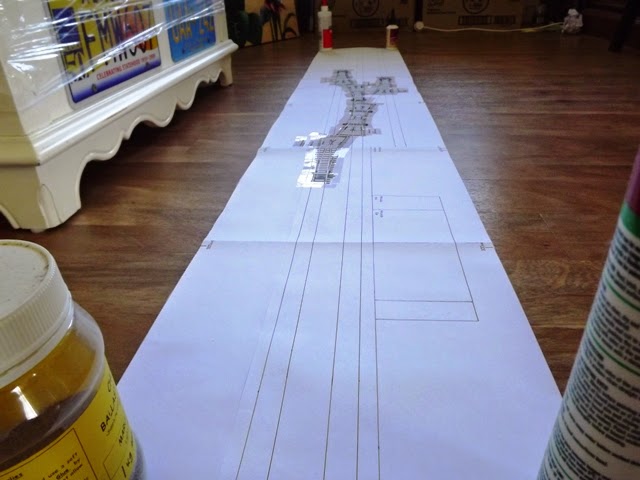 |
| A life-sized track plan allows you to look at your design from all angles before building. |
When it came to designing a plan for Philden, I had one prerequisite; the layout would have to be completely enclosed and dust-free. As you will see as I blog my way through the layout's construction, a fold-back perspex lid and removable perspex front will not only make this possible, but also keep the layout visible and on display when it is stored at home on my cabinet and keep the layout safe from prying fingers when the layout goes on the road to model train shows here in Australia.
 |
| Two NPRY cement hoppers sit on my life-sized plan to test clearances in the yard. |
When it came to designing a track plan, you have to start somewhere. I started by visiting PECO's website to download their 1:1 scale track plans for their turnouts, printed them out at home and spent an evening on the floor playing cut and paste to see what I could actually incorporate into a small station scene. I found that a double slip positioned smack-bang in the centre of the layout proved to be the key, as it reduced the need for a space-sapping run around loop. I then made an actual 1:1 scale plan by carefully sticky-taping the printed turnouts into place and drawing the rest of the track onto the reel of paper as seen above. It not only allowed me to test how the layout would handle shunting operations in the yard, but also gave me clear measurements for what space I had available for the railway station, goods shed and my concrete plant that would become home to my Southern Rail Models NSW NPRY cement hoppers. I now had a plan that, pardon the pun, was set in concrete. As PECO's double slip only came in code 100 rail, I simply adopted code 100 streamline track as standard and made myself a shopping list for when I attended the Brisbane Model Train Show in May 2015.
The layout surprisingly has enough room to operate an 82 class locomotive, 4 wagons and a 2 car Xplorer Set. Now that I have a clear plan to work to and locomotives and rolling stock that are suitably sized for my layout, I can get to work on buying the timber and plywood I need to start construction.


Comments
Post a Comment
Thanks for taking the time to visit Philden. I hope you'll book a return ticket soon. Cheers, Phil