Showing posts with label Philden. Show all posts

Thursday 6 December 2018

Phills Harbour Travel Centre


Back in the 1990's when Countrylink was rolling out its' new corporate image across New South Wales, some of the key regional railway stations dating back to the steam era were replaced with modern, spacious, brick and air-conditioned structures dubbed as Travel Centres. Grafton, Lismore and Coffs Harbour are three such examples that spring to mind, and the city of Phills Harbour on Philden's Beach Extension is no exception, with the new Countrylink Travel Centre nearing completion opposite the harbour foreshore.

The foundations are embedded into the platform and pressed hard up against the backdrop of Coffs Harbour.

It seems that straightening the beach extension back in July may have been the best decision I made before moving ahead with the new layout extension, as it left me with enough room to build a structure sizeable enough not to be called a building flat. The curved platform and track angle that ends in the corner of the shelf called for the station to be confined to the mouse-hole end of the layout, and having already built the box housing that will hold the structure in place on the platform, it was time to turn my basic plastic kit into something else.

Printed brick paper covered in vinyl adhesive film makes for a shiny-clean tiled floor.

The structure was in fact a cheaply produced convenience store kit bought on eBay and posted from China for less than ten bucks. But as is often the case with bargain-priced anything, you get what you pay for. In this case a plain grey one-coloured shell with no provision for glass window panes. Keeping the floor unattached from the building shell for when I come back to add figurines at a later date, I first covered the interior floor with some self-adhesive printed HO scale brick paper. Being a printed paper surface, I also covered the brick paper with clear self-adhesive plastic book covering to protect the printed surface, trimmed it to size with scissors and stuck it to the floor area. I next used some of the pieces of the kit intended to be the roof mounted sign, to fashion a booking counter and passenger waiting lounge. I also added an interior support column for the roof using a piece of unpainted styrene H channel, and got to work printing some scaled to size vending machines to fill out the waiting room area.

Phills Harbour Travel Centre received a two-tone brick building, similar in design to Grafton Station.

Skinning the building turned out to be an easy and rewarding project, thanks to some 3D printed brick sheets I also found on eBay. Printed on a vinyl-like paper, the bricks had that rough texture and simply need to be cut to shape and glued to the styrene shell using some water based craft glue so as not to leach the colour. To break up the monotony of a plain one-coloured brick wall, I embedded two strips of the self-adhesive printed brick paper (also covered in clear self-adhesive wrap), that I'd trimmed to two brick width heights with scissors. I placed one strip at platform height, and stuck the other nicely between the door frame and below the rear window height, making trimming around the window areas so much easier. For this exercise I put away the ruler, and could simply cut to the nearest brick height, glue and repeat until finished.

The unpainted window and door frames look close enough to aluminium frames.

The shiny brown brick trim contrasts nicely with the rough tan colours of the 3D brickwork, and looks more like glazed decorative tiles. I'd put aside the oversized convenience store fencing, and instead fashioned it into an aluminium awning to wrap around the main corner of the travel centre.

The roof will get some special treatment after I build a row of roof-mounted air-conditioners.

I think everyone knows the type of modern awning I've tried to represent; the stupid architecturally-designed type that protects you from neither the sun or the rain yet seems to lend itself to building designs all the same. Anyway, its there for passengers to complain about when boarding the train.

The test-fit to ensure the travel centre matches its surroundings.

With the outside of the building now skinned in 3D brick paper, I test-fit the building to see how else I could improve its appearance. There was enough 3D brick paper left over for me to do the two inside facing walls, so off the floor came again, and I bricked the inside of the travel centre to the height of the top decorative brown brick trim. I need to glue the window panes to something other than textured paper, so simply left the top of the inside wall an unpainted grey.

The waiting room needed some extra interior details thanks to those big, wide windows!

Before cutting and fixing the Evergreen clear styrene window panes to the main floor to ceiling window areas, I glued my printed vending machines to the back wall. Along with the Coca-Cola, Pepsi Max and Smith's Crisps vending machines, there is also a coffee machine, map of the Sydney Trains network, three Telstra pay phones, an Xplorer poster and some vintage next train destination boards that were fictitiously salvaged from the previous station and put on display inside the new travel centre. I took this photo before adding the window glass so that the interior detail would be more visible. As for the unpainted awning, window and door frames? I'm leaving them that way. I've cleaned enough office windows with my cleaning business to know that aluminium frames look silver-grey.

Phills Harbour Station, with Philden visible through the mouse-hole at the far end of the layout.

Also added to the outside of the building were two almost unnoticeable signs. The one above the door actually says 'waiting room' and 'toilets', complete with the disabled symbol. The other is a photo of the actual Countrylink 'coaches' sign that once stood at this end of my layout when it was just staging. I photographed it, reduced it in size and printed it out before covering them with the clear self-adhesive wrap and gluing it to some card. After trimming it to size I stuck it to the underside of the aluminium awning directing passengers down the ramp towards the waiting road coach connection. It's a nice bit of trivia to have incorporated into my own layout. I now only have to wait for someone to produce a Countrylink road coach in HO scale to park between the platform and the backdrop.

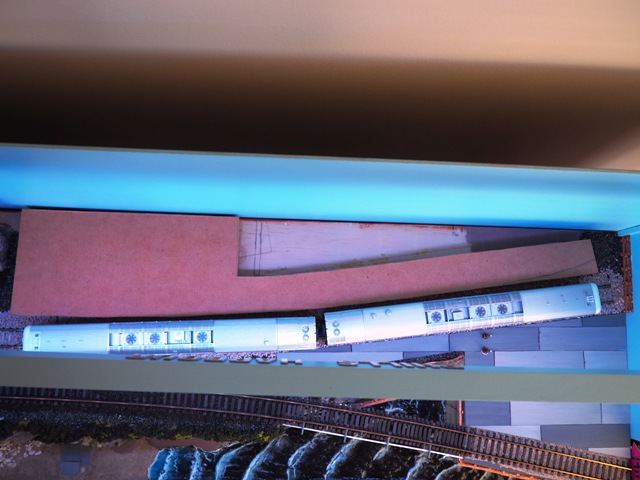
My newly arrived NDFF hoppers drop some ballast on the tracks alongside the new station.

Although the nuts and bolts of the travel centre are now finished, the model is far from complete. I still have to build a row of roof mounted air-conditioning units, a skylight and add the station name signs to the platform before the first 'official' train will arrive at Phills Harbour. So for now, railfans will have to be content with watching Railcorp run ballast trains into the newly constructed platform road. These freshly painted NDFF hoppers arrived only today, and straight out of the box look fantastic. Thanks to flipping some items on eBay and Australian Modeller's 20% Off Black Friday Sale, I was able to add these and some Freightcorp NQYY container wagons and new containers to the layout, so expect to see some more photos of these in action in the near future.

While Phills Harbour is purely a fictitious station, I think I've captured the look and feel of a 90's era Countrylink Travel Centre as I remember them appearing around the turn of this century. With Philden station just visible through the mouse-hole at the far end of the layout, it gives me a decent enough run to shuttle my 2 car Xplorer train back and forth from the outback to the sea. Once I add some lights to the station area and around 20-30 passengers waiting inside for the train to arrive, Phills Harbour will become one exciting little railway station.

See also; Building the Beach Station

Sunday 28 October 2018

Adding the layout backdrop


Finally, thanks to a realistic backdrop, I have transformed my 9' foot bookshelf layout into a slice of outback New South Wales. Gone is the plain blue sky that has been a staple on Philden since the layout first made its public debut, and in its place is the photo that my wife Denise took while travelling back along the Kidman Way past where the rails end at Rankins Springs.

But, as often happens whenever I've tried something different on this layout, it didn't go quite to plan. Thankfully in this case, not being happy with the first attempt pushed me to try again. And as you can see in the above photo, the end result was worth the extra perseverance.

Remember my photo taken at Coffs Harbour?

After preparing the photo backdrop in my previous post, I started first with the background photo I'd taken at Coffs Harbour. This was to replace the blue sky backdrop for the beach extension, that in turn had replaced the simple two track staging shelf that was shown when the layout was featured in the August 2018 edition of Australian Model Railway Magazine. After cropping and sizing the image to have printed at Officeworks, I positioned the finished photo alongside the existing backdrop panel to work out the area I would need to trim.

The bottom of the scene needed some of the wharf detail to be trimmed away.

This photo was taken from the top of Mutton Bird Island, looking west across Coffs Harbour Jetty. As such, it had a lot of detail scene of the jetty in the bottom of the picture that I didn't want showing.

The remaining 1 cm at the bottom would then disappear when slotted into the recessed channel that holds the backdrop.

Knowing that the bottom 10 mm would not be visible once the backdrop was slotted back in place, I left only the tips of some of the jetty light fixtures showing. The idea was to preserve as much of the residential and commercial scene that surround Coffs Harbour Station as possible. When applying the printed EZ-Tac adhesive film to the painted blue backdrop, I used scissors to cut only the bottom and left hand edge of the image. I then had Denise help peel back the film backing as we worked left to right, being careful to be sure the bottom of the image lined up perfectly with the bottom of the backdrop surface. I then turned the backdrop over and used a sharp hobby knife and some scrap board to trim the image flush with the backdrop edge.

I slid the finished backdrop into place on the beach extension for a perfect result. So far so good.

Then I hit a snag with the outback scene that will complete the main layout area. There was some confusion with the sizing chart on Officeworks' website, and my idea of printing 2 x 915 mm x 305 mm sized prints to join together on the 1830 mm long backdrop soon proved to be a disaster. Not only did the two sections look odd on account of the colour difference in both the sky and grasslands from one end of the image to the other, Officeworks' printer actually added a 5 mm white border around the entire image, meaning that the two combined sections were 25 mm too short in length by the time I had applied them from left to right. I know I could have experimented with adding trees or some other kind of structure to disguise the join and the blank area where the image was too short, but being a bit of a perfectionist it just looked horrible.

The first attempt of using 2 x 915 mm length prints to complete the 1830 mm long backdrop was a failure!

Look at the above backdrop join, and you'll appreciate the meaning of the phrase "miss by an inch, miss by a mile."

To this point, the layout backdrop had already added up to $125. Once again, there was some confusion with the online pricing calculator and the in-store costing. A quick explanation for this is that the costing and sizing was for pre-set print sizes, (in much the same way as a K-mart or prints ordered over the counter at a photo lab), but by using a 600 mm wide film they could custom print to my required length of 1830 mm. So long as I factored in the 5 mm white margin that the printer added. I then re-worked my photo to a single image that was 1840 mm long. While some of the foreground took on a slightly blurred look as a result of being re-sized to such a large file size, I was able to mirror-flip the image using Adobe Photoshop Elements 8.0 to enable the open grasslands area to stand opposite the cement plant, while the blurry foreground bush in question then tucked in behind the railway station building out of view.

The extra work was worth the reward. The finished image printed out in a single length of 1822 mm, and despite the printer claiming more than the 5 mm border margin, I was able to cut along the bottom of the picture and simply apply the backdrop from left to right using a 4 mm indentation at either end. Each end of the finished backdrop, (plus the bottom of the image) sits inside the 10 mm deep channel anyway. I then turned the backdrop over, and trimmed the top of the EZ-Tac print flush with top of the backdrop board. The end result? Perfect!

In a nutshell, what I really did was use this formula...

+


=

&


The two completely different scenes are separated by the mouse-hole through the underpasses that define each module. While the backdrop colours from my wife's photo taken out-the-back of Rankins Springs match beautifully with the scenery dirts, scatters and grass tufts that I used when constructing Philden, its' the little things that make this backdrop work so well on my finished layout. Details such as aligning the height of the horizon with the brick overpass beside the station, making sure that the height of the foreground trees were above the level of the horizon and the lack of any structure whatsoever on the printed backdrop. While I say that my layout represents the far northwest of New South Wales, and the photo was taken between Hay and Rankins Springs in the far southwest of the state, it is purely a fictitious layout after all. In just wanting to capture the essence of a far-flung corner of the New South Wales Railways' network, I think I've done it well.

The finished backdrops both add an element of depth to my narrow 1 foot wide bookshelf layout.

The beach extension is another thing altogether. It is effectively just a two track staging shelf for the rest of the layout. Only instead of keeping with the black painted shelf with the decorative Countrylink coaches sign that the layout had when it debuted, I have replaced it with a separate scene. After toying with the idea of building this extension as a suburban scene complete with overhead wires or modelling a different era altogether, I settled on building another fictional scene. This time it is Phills Harbour (as opposed to Coffs Harbour), although the backdrop of Coffs Harbour and the much-shortened station or Countrylink Travel Centre as it was known, will be a working reminder of one of my favourite holiday spots.

Although it would have been cheaper for me to have used a commercially available backdrop, (thanks in part to the extra cost of reprinting the larger of the two), I now have a unique backdrop that my wife has contributed to my layout.

The downside is that the cost of printing the backdrops have blown a hole in my model railway budget for the remainder of the year. With the track plan for my next HOn3 1/2 layout still bouncing around from one configuration to another, any work will have to wait until after I return from our Christmas holiday in Coffs Harbour, (yes the real version). Aside from some pre-ordered locomotives I am waiting on (the NSW 442's and 422), there have been a lot of other enticing announcements trumpeted of late that now appear shot to pieces. With the backdrops having transformed my layout, there are a lot of newly announced locos and wagons that I would really like to see running on Philden. I could name four off the top of my head that now appear out of reach if I'm serious about building a second QR narrow gauge layout. But as always with life, there just seems to be too much to do, and too little time to do it!

See also; Preparing the photo backdrop

Tuesday 16 October 2018

Preparing the photo backdrop


It's amazing what a model railway convention can do to stir the enthusiasm to get stuff done on a layout. Fresh back from last weekend's 2018 Modelling the Railways of Queensland Convention, I decided it was time to put aside work on my next book for a week or two, and get the photo backdrops organised for both Philden and the new beach extension. Part of this enthusiasm can be attributed to fellow modeller Anthony Veness, who I not only car-pooled with for the drive down to the convention from the Sunshine Coast, but who was also one of the presenters on the weekend with his small layout Dagun.

While I put the camera away for the convention to simply take it all in, those who were present can probably attest as to how well his backdrop turned out. In reality it involved nothing more than taking his image to Officeworks, and having it printed out on a B-Zero sized EZ-Tac adhesive poster that cost him no more than $38 Australian. So after returning from the convention, I checked out the poster sizes available on Officeworks' site (link here), to see what I could do for Philden.

I shot this image of Coffs Harbour Jetty when last on holiday in 2014.

The biggest limitation for a 9' foot long bookshelf layout is the poster length sizes that are available. I went through their panoramic sizes to find that the 762 mm x 305 mm size was the closest size available for the backdrop on my beach extension. The beach extension's removable 3 mm MDF board backdrop measures 750 mm x 230 mm, so will really require only minimal trimming. When last on holiday in Coffs Harbour, I took the standard tourist snap of The Jetty from the top of Mutton Bird Island while on a walk one morning. With the morning sun behind me, the photo captured the colours of the mountains and buildings with consistent enough lighting to consider using it as the backdrop to my fictitious harbour scene.

A reduced size image of the final area selected to print out as the backdrop for my beach extension.

The beach extension has only a small area of waterfront modelled at the front of the module, so to use the scene with the jetty included would place the station in the middle of the harbour and only look confusing. The key was to select which area I could use as distant scenery behind my beachside station. I used Adobe Photoshop Elements 8.0 to create a blank 762 mm x 305 mm image the same size that Officeworks would print out, and enlarged the photo until it filled the area. I then aligned the red bricked building in the left of the image with the 100 mm height of the highway overpass on my layout. When printed out, the image will need 70 mm trimmed off the top, along with 16.2 mm from the right hand side before I stick it in place. The bottom 10 mm of the image won't be visible once the backdrop slots into the channel that holds it in place. Any remaining unwanted foreground details will be obscured by the station platform anyway, or can be obscured with some strategic placing of some small shrubbery in the garden area behind the station.

Finally I auto-enhanced the image to the highest quality possible and saved it to a USB stick to take with me to Officeworks. The original 4.76 MB photo is now a 9.6 MB file. When viewed at actual size, there is a slight distance-haze to the outline of the buildings and trees, which should make for a great backdrop image as it's important to not make the background scene look sharper than your foreground modelling efforts. So if you wonder what looks so familiar about Phills Harbour in the future, the answer will be that it has Coffs Harbour as the backdrop! So far so good. I thought I'd got the more difficult image out of the way first!

We saw a whole lotta nothin' on our recent trip across outback NSW. This is the look I wanted for Philden.

During our recent trip to Victoria and back to visit Denise's Mother, on the way back home to Queensland, we diverted via Echuca, Hay, Rankins Springs and into West Wyalong before continuing north to our overnight stop at Dubbo. I wanted to see some wide open spaces on the edge of the outback. And between Hay and Rankins Springs that's exactly what we saw.

Denise took this photo in the middle of nowhere from the car window as we drove from Hay to Rankins Springs.

I've always wanted Philden to capture that flat, nothing to see as far as the horizon look. My plain blue sky has managed to portray a sense of that since June 2015, but three years on I felt it was time to emphasise it a little more. Strangely the shot I wanted to work with wasn't one of the many taken when we stopped beside the highway to photograph emus, but rather one taken from the window of a car travelling at 100 kph.

Not only did I discover that Officeworks don't have anything near a 1830 mm x 230 mm size option to print a backdrop, even on the closest size which was 1219 mm long, the foreground of the above photo looked horrible and blurred. I tried with countless photos that included emus, but in each case the emu would have printed out at a staggering 80 mm tall. That's taller than my railway station! The answer was to go with two 914 mm x 305 mm sized poster prints, and repeat the scene with a join in the middle.

This backdrop should really emphasise that Philden is located out west in the middle of nowhere!

What sounds and looks quite simple actually took me the best part of a day to complete. Okay, the latter part of said day was spent drinking wine on the balcony with my wife and commenting on how different my layout backdrop is going to look compared to our water view of the Pumicestone Passage, but I'm sure you get the point.

Creating a 914 mm x 305 mm blank file in Adobe PSE 8.0, I was able to nicely enlarge the original photo and crop the entire blurred bottom portion of the image altogether. I set the horizon level at the same height as the highway overpasses at each end of my layout, so that the horizon should only just be visible above the roof-line of my railway station. Finally I played around with the contrast and brightness until the reddish soil in the image was a good match for the dirt scatter I'd used on the layout. The tricky part was getting the horizons to match when placing two images side-by-side. It turned out I needed to rotate the image anti-clockwise by 0.6 mm to get it perfect.

I know it might be cheating to repeat the same image side by side over a six foot long span of layout backdrop, but if you've ever seen the far west of New South Wales, it all looks the same anyway. Miles of nothing! I then saved the image in the highest quality possible, and turned the original 3.4 MB photo into a whopping 16.1 MB panoramic image.

I made sure I kept an open mind when attending my first model railway convention, and simply took everything in. If you approach everything as a know-it-all, you ultimately never learn anything new. Instead I came away with a slightly clearer way of looking at the process of things. How different people do different things, to essentially arrive at the same conclusion. In my case, I'm sure others have found it easier to match their scenery to their backdrops, rather than try finding a backdrop for their scenery! I guess the proof will be in the pudding as they say. Tomorrow I'll drop by Officeworks with the USB containing my backdrop images, and two days later they should be ready to collect in time for me to install them this coming weekend.

What I'm most looking forward to about adding these backdrops to my layout, is hearing people at future model trains shows asking where I got my backdrops from. It'll be nice to say that my wife took the photo, and stand back to see their reaction! Until next time....

See also; Painting blue skies blue

Sunday 19 August 2018

Building the Beach Station


Work is continuing on my layout during the two week break that I've had between model train shows, with the former two track staging yard now looking more and more like a finished diorama.

I was also lucky enough to find another brass-coloured station name to match in with the four other NSWGR destination board signs that are already mounted on the rest of my layout. Lindfield, for those who aren't familiar with Sydney, Australia, is a station located on the North Shore Line via the Harbour Bridge.

The foundations for the brick platform edging were laser cut by Stuart from Walker Models.

Constructing the curved brick platform for Phills Harbour was a lot more difficult than the platform that I built for Philden Station three years back, but was made a lot easier by the fact that the brick platform edging was laser cut for me by my good friend Stuart from Walker Models up at Coolum Beach. All I had to do was paint it, which consisted of nothing more than mixing a white-ish wash of mortar mix to swear over the brickwork and gently wipe away before it completely dried, leaving it congealed in the mortar lines only. The bricks are simply unpainted MDF board, (that with the white smear of paint) are a great match for the modern orange-cream brick that was used on Grafton Station on the North Coast Line.

I used two A4 sheets of paper to trace the outline for the top platform area.

I made the platform surface from 4 millimetre MDF board, and to work out the clearance and overhang for the rail side of the platform, I simply used two pieces of A4 copy paper to outline the platform edge with a lead pencil. I then cut the outline using a pair of scissors, and traced the outline of this with a lead pencil direct onto the MDF sheet, which was then cut using a sharp hobby knife before sanding the edges smooth with some extra fine sandpaper.

An overhead view to test that the 2 car Xplorer actually cleared the platform edging.

The single piece platform was then placed into position to test the clearance with my 2 car Xplorer train, (the longest piece of rollingstock which operates on my layout).

The single piece 4 millimetre MDF board platform showing the cut out area to house the lighting.

I want the station building, or in this case the Countrylink Travel Centre, to be removable for if I ever need to change LED lights which I will install from beneath once this scene is completed. So I cut a large opening beneath where the structure will stand on the platform before I began painting.

The overpass at the southern end of the station area includes these cool banana trees from Modellers Warehouse.

While I kept coming back to apply several thin coats of acrylic paint to the platform over the course of a week, I also rebuilt the concrete overpass that disguises the number 2 mouse-hole entrance/exit between the two layout sections while I had my layout in pieces. With the third track now removed and the remaining tracks straightened out into a more gentler curve, there was no need for me to have the concrete walls fanned out into such a noticeable angle. Especially with the larger locomotives such as the NR and L Class locos I once had on my roster now long departed. What that required however, was for me to build the concrete abutments double-sided as you can see above. I painted these to match the concrete abutments on the other side of the mouse-hole highway overpass that leads to Philden Station at the same time that I painted the platform.

Once finished, I glued the new highway overpass into position, patched the ballast on the areas beside the concrete abutment, and super detailed the rock scenery with over 200 individually applied grass tufts and the great banana trees you can see in the photo above which I purchased from Modellers Warehouse at the recent Strathpine Model Train Show.

The finished platform glued into place showing the box housing for the removable Travel Centre.

The entire station area then had the same scenery treatment applied, with a couple of gum trees added in areas that won't impede operation, some rubbish bins behind the far end of the platform and another of the fantastic palm trees from Modellers Warehouse added down at the beach level. I almost used all of the 420 grass tufts I bought on this extension alone. Finally, I then glued the single piece platform into place and stood back to admire the scene so far.

The first look at my Countrylink Travel centre sitting snugly on the platform inside the box housing.

I used unpainted white polystyrene strips to build the box that will house the Travel Centre on the platform, and the base of the structure fits perfectly inside. I've never worked extensively with styrene before now, but its something I'm going to have to do as there are no Australian models available of anything that resembles the modern era Countrylink Travel Centres that were rolled out in the early 1990's, around the same time that my 2 car Xplorer train was introduced into service. As a starting point, I bought a cheap one-colour plastic kit for $10 on eBay. For that price it was cheaper than buying a single sheet of 4 mm styrene and included the postage price from China! At least it gave me 4 walls that I could use as a starting point to construct my model around.

I then stocked up with the other sheet styrene I needed at the recent Strathpine Model Train Show, and can now begin building the platform awnings and angled roofing that will cover the road coach set down area that you can see in the photo above. The roofing will all connect to the rectangular Travel Centre building to create the effect of being one big, modern monstrosity.

The view from what will be the front of the beach extension.

So with next weekend's Redlands Model Train Show being Philden's final outing for the year, it seems I'm agonisingly close to having the new extension completed in time. Only, once more I will have the layout displayed from the other side, and the new extension will remain hidden for now from the public behind the reversible backdrop. After the Redlands Model Train Show, I will have a break of 8 months before I exhibit the layout again, which will give me plenty of time to complete the extension to my liking, including adding lighting, figures, more palm trees and finishing the Travel Centre with a complete interior. By the time I display my layout again at next year's Brisbane Model Train Show, the layout, including the new extension, will be as finished as it's ever going to be! And then I can move onto my next project.

See also; Straightening the Beach Extension

Sunday 5 August 2018

Strange Saturday at Philden


Some absolutely downright bizarre movements occurred over the weekend, when a number of strange sightings were recorded passing through Philden late on a Saturday afternoon. It was if the hands of time were turned back, as one-by-one a procession of out-of-place, out-of-time trains time travelled through the mouse-hole portal and onto my layout. But before you jump to the conclusion that I've changed eras, the accompanying photos were all models belonging to another Sunshine Coast modeller, Anthony Veness, who stopped by for a much shortened running session after we were both waylaid in the north of Brisbane at the Pine Rivers Model Train Show. With the beachside extension now ballasted and operational once more, I captured the following images, beginning with the Berg's Hobbies Sydney suburban parcels van shown above, running between Philden and Phills Harbour.

Another Berg's Hobbies Sydney suburban electric set, this one with the blue & white 70's era driver car.

No sooner had the parcels van cleared the station, a 3 car single deck suburban set magically arrived without any wires, reminding me of the days I would see a mix of red rattler and blue & white single deck sets poking their heads out of the Hornsby car sheds as I'd ride the train from Gosford to Sydney.

A pair of heavily modified and beautifully weathered Powerline 48 class locos.

Next spotted in the yard at Philden, were a pair of Powerline 48 class locos, one in Indian Red and the other in the 125 Years of NSW Railways commemorative livery. It was around this point that I began to question my reasons not to have bought one of the recently released Auscision 48's.

As evidenced by this photo, the 48's would actually have suited my layout very well.

Fortunately the 48's were only brief visitors, and soon the pair departed light engine from the platform, taking with them any lingering questions as to whether I should still try to find some money to add the little Alco to my layout's roster.

What's a V/Line passenger A class loco doing shunting in Philden Yard? That ain't right!

It was around this time that things got really weird. Next spotted shunting in Philden Yard was an Auscision A class Victorian locomotive painted in V/Line passenger colours. I'm not sure if this loco ever ran on standard guage to be this far from home, and it looks about a strange as seeing Gary Ablett Jnr lining up for the Cronulla Sharks!

The newly released Wombat Models C30T class steam loco. What a delightful little engine it is to run!

Next to saunter into Philden Station was the C30T NSWGR steam locomotive recently released by Wombat Models. This loco is delightful to run, and the fire irons, driver and fireman figures and footplate details have me thinking that this model is a steal at the $350 it was released for. Apparently there were some minor issues for its owner to smooth out such as adjusting the spring arm that pushes the front pilot wheels to the rails, and removing some minor flash moulding that is visible on the top of the boiler, but that aside, it sure is a delightful little engine!

One nice little New South Wales steam loco!

Once the 30 had simmered at the station long enough to be admired and photographed, it too chugged out light engine and never to be seen again, as its owner plans to install a DCC chip inside it, thus making it unable to return for a visit. Still, it was nice to have the rare opportunity to photograph some steam at Philden.

Now that's nice! An Auscision Models pair of Interail/QR National 421's seen in Phiden Yard.

Things then started to return to normal, as my own 421 class Interail loco 42109 appeared, only this time coupled with visiting QR National sibling 42103. The QR eagle livery on this model is striking! Had I had the money and foresight at the time, I too would have added this loco to my roster.

Seen idling above the harbour, these 421's look right at home together. Pity only 1 of them is mine!

With the 421's last seen trundling off into the Port Authority Yard at the newly opened Phills Harbour, the eagle livered QRN loco was soon packed up into the time-travelling locomotive storage box along with its other friends, and I farewelled Anthony and thanked him for an awesome day of driving down the Bruce Highway to the Pine Rivers Model Train Show and for an afternoon of talking and running trains. Having the chance to run some different locos on my small layout was an eye-opener. It was a real surprise to discover that my small layout has a strong non era-specific nature about it when it comes to swapping locos or rollingstock. I hadn't quite expected that.

The beautiful character of Auscision's 46 class is there to be seen, but what do I do about the wires?

And finally to round-out the afternoon cavalcade of colour, I placed this newly acquired 46 class locomotive on the tracks to consider another case of the 'could-have-been's'. I've had this loco for a few months now, only I've kept its knowledge quiet from my model train friends on account of one thing.... the wires. Or lack of any on my layout.

Pent-up over the pantographs. They're beautiful, but running them up requires a rebuild of one end of my layout!

This model sold out the first time, and whilst the re-released version with the white roof was still available, I bought one and tucked it away while deciding if, or should, I add the overhead wires to the short beach extension of my layout. My thinking was that I could have a country/city transition between sections, with the wires emphasising the rails had reached Sydney's outer reaches. But the extension in its new form is still nothing more than a staging shelf, with the added bonus of having scenery in place. Adding wires? Well, that's just going to complicate placing and removing rollingstock from the rails. As for the pantographs? Unless I want to rebuild the mouse-hole beneath the overpass to make it 1.5 cm higher, then I'd have to always run this model with pantographs down. I wish I had the chance to run one of these locos first on my layout before buying one. And after a great afternoon of running some different locos on my layout, I thought the timing was right to move the 46 Class on, and place it up on eBay.

I suppose chopping and changing locos is a way of keeping a small layout looking and feeling fresh to operate. I also recently moved on the AustrainsNEO NR class on account of it being a little too long to work in and out of every siding with a wagon in tow. Now, I'm hoping that the soon-to-aarive 442 Class loco proves to be the final answer for my layout. A simple roster for a compact bookshelf layout in the form of a 421 Class and 442 Class locomotive to work alongside my 2 car Xplorer train. Apart from that... there is always the option of having another Strange Saturday at Philden somewhere further down the line!

Sunday 29 July 2018

Straightening the Beach Extension


Philden's track working crew moved in over the weekend to straighten the bottleneck that was hindering operation on the new beach extension. The three track configuration was lifted up and the turnout for the number one siding removed ahead of works commencing on the new Countrylink Travel Centre. The mainline and platform terminus track has been straightened and relaid over the original alignment of the number one siding, while the lead track to the future Port Yard was also lifted ahead of the bridge crew carrying out minor structural enhancements to the concrete spans.

I thought this simple detail addition made a simple balsa wood bridge more believable.

The signals branch also had to retrofit the port access bridge with steel arms to carry signal cabling across the right-of-way. The steel brackets, (leftovers from the Faller cement plant) were attached to the bridge on the harbour side, with the white plastic conduit carrying the cabling (unpainted white 2mm styrene rod) attached to the underside as shown in the above photo.

There's still more detail to be added around the harbour walls.

Port Authority personnel then moved in to finish the concrete harbour walls with timber capping, and attempted to secure the area with some chain link fencing, which unfortunately rusted the moment it was erected due to the salt air.

The bridge looks so much better with the spacing sprues removed from between each sleeper.

RailCorp workers then moved onsite to re-lay the Port Yard lead track across the bridge, cutting the spaces between each flextrack sleeper or tie to ensure closer spacing over the concrete span while also allowing a slightly wider gap for the rails to clear each of the steel signal cable brackets.

Realigning the platform road required cutting a straighter approach through the concrete apron.

Architects for the new state-of-the-art Travel Centre then had to consult with Port Authority and RailCorp personnel over the alignment of the new end platform road, with the result being that the concrete apron on the Port Authority Yard was trimmed back to ensure a straighter approach to what will be a stub-ended platform siding.

The original design looked better, but the space constraints made operating difficult.

Compared to earlier construction photos (above), the resultant changes will now mean that any freight locomotives will have to be stored between duties on the approach prior to the Port Authority bridge at roughly the location of the former turnout in the above photo.

The new arrangement has more room to get hands-on, and size enough to build a bigger station structure.

With Countrylink deciding to terminate all future passenger services at Phills Harbour, the new platform road will be provided with a buffer stop, and earthworks are already taking place at the end of the newly laid track. The concrete area to the side of the platform road will now be set aside for fuel and crew provisioning facilities for Countrylink Xplorer services, while work has already commenced on positioning the platform base and edging for the future station. The new arrangement will greatly simplify rail movements to and from nearby Philden Yard, while also allowing for massive expansion opportunities should the Port Authority move in that direction.

When contacted, the Countrylink Area Manager of Operations stated that the necessary track wiring had already been completed, with ballasting set to commence the next day. Plans for the new Countrylink Travel Centre were already finalised, and once finished, future passengers could expect a pleasant and modern station to greet them when boarding the train to Sydney. For the moment, road coach connections will continue to transport passengers to nearby Philden to connect with the daily South North West Xplorer. Phills Harbour Station is earmarked to be completed by Christmas 2018.

See also; The Port becomes operational